
Mastering
How to Prepare a Suno Track for Professional Mastering
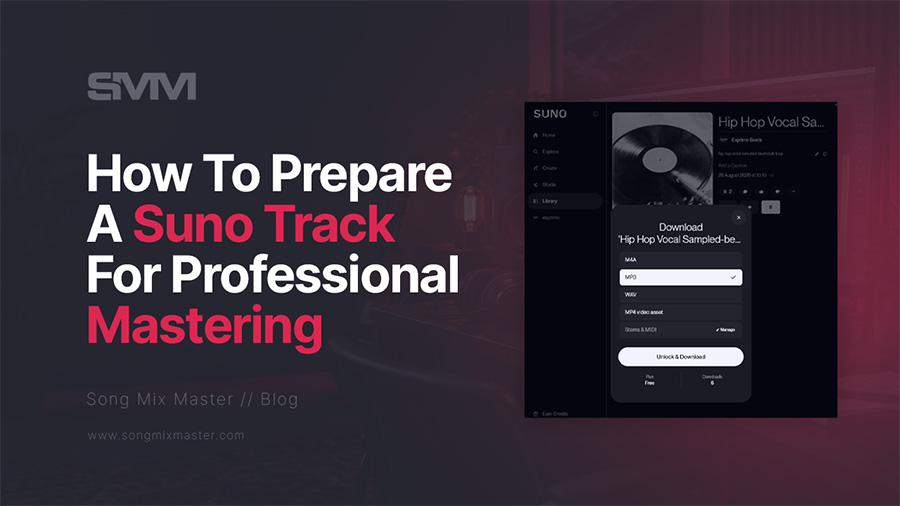
Good mastering starts before the mastering session begins. The quality of the file you send, the processing already printed into it, and the information you give the mastering engineer can make a noticeable difference to the final result.
This is especially important with Suno because the song may already contain tonal shaping, dynamics, ambience, stereo processing, and artifacts inside the generated stereo file. If you then add another limiter, normalize the track, convert it several times, or process it through an automatic mastering service before sending it to an engineer, you may leave less room for useful mastering decisions.
When I receive a Suno track for mastering, I prefer the cleanest version that still represents the sound you actually want. You do not need to create artificial headroom, remove every plugin, or prepare a special “mastering version” according to a rigid technical formula. You simply need to avoid unnecessary processing and give me the best source available.
1. Finish the Song Before You Send It
Mastering should be the final stage of a finished production, so I recommend resolving creative decisions before you send the track. Listen through the complete song and make sure the arrangement, lyrics, transitions, ending, and overall performance are the versions you actually want to release.
If a word is wrong, a chorus transition feels broken, or one section contains an obvious generation artifact, correct that problem before mastering whenever possible. Mastering can improve the final presentation of the audio, but it cannot rewrite a lyric or reconstruct a section that should have been regenerated.
This sounds obvious, yet it saves a surprising amount of time. There is little value in mastering version three if you later decide version four contains the better vocal performance.
2. Choose the Strongest Suno Generation, Not Just the Loudest One
If you generated several versions of the same song, compare them before deciding which one to master. I would not choose a version simply because it already sounds louder or brighter. Instead, I would listen for the generation with the strongest combination of musical performance and technical quality.
Pay attention to vocal clarity, drum definition, bass stability, transition quality, stereo behavior, and obvious artifacts. A version that sounds slightly quieter but cleaner often gives me more room to create a strong master than a louder generation that already sounds strained.
The source matters more than the starting LUFS value.
3. Download the WAV Whenever It Is Available
For professional mastering, I prefer the original WAV supplied by Suno whenever you have access to it. Suno currently makes WAV song downloads available to Pro and Premier users through its web interface, while MP3 remains available more broadly.
The reason is not that WAV magically removes limitations from AI-generated audio. It simply avoids adding another lossy encoding stage before I start processing the track.
Mastering can involve EQ, dynamic processing, resonance control, clipping, saturation, and limiting, all of which can make existing compression artifacts more noticeable. Beginning with the best available source gives me more freedom.
I explain the difference in detail in my guide to Suno WAV vs MP3 for mastering.
If You Only Have an MP3, Send the Original MP3
An MP3 does not make professional mastering impossible. If it is the best source you have, I can still evaluate and master it.
What I would not recommend is converting the MP3 into WAV and assuming that the larger file has restored the missing information. The conversion creates an uncompressed version of the already encoded audio, but it cannot recover data discarded during MP3 compression.
If you have both files, send the original WAV. If you only have the MP3, send the cleanest original MP3 rather than repeatedly converting it between formats.
4. Keep an Untouched Copy of the Original Export
Before you experiment with processing, save the original Suno export somewhere safe. I strongly recommend keeping this file unchanged so you always have a clean version to return to.
You may later try automatic mastering, clipping, EQ, restoration, stem extraction, or another production workflow, and some of those changes are difficult to reverse once they have been rendered into the file. Keeping the original means you never have to rely on an already processed version as your only source.
For a track you care about, I would archive the original Suno WAV, any important stems, the final premaster if you create one, and the approved final master.
5. Do Not Add a Limiter Just to Make the File Look Ready for Mastering
A mastering engineer does not need the track to arrive loud. In fact, unnecessary limiting can remove some of the room I would otherwise use to shape the final dynamics.
If you added a limiter because it is part of the sound you deliberately created, that is different. A clipper or limiter can be an artistic part of a production, especially in dense electronic music, hip-hop, or other genres where saturation and controlled clipping contribute to the character.
The distinction comes down to intent.
If you like the sound because of the processing, keep it and tell me what you did. If you only added a limiter because you thought a mastering engineer expected the file to arrive near commercial loudness, I would rather receive the cleaner version.
6. You Do Not Need to Force the Track to -6 dBFS
There is a persistent mastering myth that every premaster must peak at exactly -6 dBFS. I do not require that.
What matters is that the file is not unintentionally clipping and that any final limiter or clipping stage you added is there for a musical reason rather than because you were trying to manufacture headroom.
If your clean mix peaks at -2.7 dBFS, I can work with it. If it peaks at -8 dBFS, I can work with that too. Digital gain can be adjusted transparently inside the mastering session.
Artificially lowering the entire file does not create additional dynamic information. It only changes the numerical level.
If you want a deeper explanation, read my guide to headroom for mastering.
7. Avoid Normalizing the Track Unless You Have a Specific Reason
Peak normalization simply changes the gain of the file so that its highest peak reaches a selected level. Loudness normalization changes gain according to a loudness target. Neither process inherently improves the audio.
You therefore do not need to normalize a Suno track before sending it to me. I can set the operating level appropriately inside the mastering session.
The most useful version is usually the cleanest finished source, not a file that has been mathematically adjusted to a particular peak or LUFS target beforehand.
8. Do Not Master the Track With AI First Unless You Want to Use It as a Reference
If you already created an automatic master and genuinely like something about it, send it. It can be useful as a reference because it tells me something about the direction you prefer.
Perhaps you like its bass weight, its loudness, or the way it brightened the vocal. That information can be valuable.
What I do not want is the AI-mastered file as the only source if a cleaner Suno export still exists. Compression, limiting, saturation, and aggressive EQ printed into the automatic master give me fewer options than the original file.
The ideal approach is to send both files and label them clearly:
- Original Suno WAV
- AI Master Reference
I can then understand the direction you liked while still mastering from the cleaner source.
If you are deciding between these approaches, my article on AI mastering vs human mastering for Suno explains where each method makes sense.
9. Send One or Two Useful Reference Tracks
A reference track is one of the easiest ways to communicate what words sometimes fail to describe. If you tell me that you want the song “warm,” “wide,” or “punchy,” those descriptions are useful, but they can mean different things to different people.
A well-chosen commercial reference gives me additional context about the low end, vocal position, brightness, dynamics, and general presentation you have in mind.
I usually prefer one or two references rather than a long playlist because several contradictory examples can make the target less clear rather than more useful.
Choose references that are reasonably close to your song in genre, arrangement density, or sonic direction. They do not need to be exact matches.
I explain the process more thoroughly in my guide to reference tracks in mixing and mastering.
10. Tell Me What You Like About the Current Sound
Mastering notes do not have to be technical. In fact, some of the most useful notes are simple descriptions of what you want to preserve.
You might tell me that you love the dark character of the instrumental, that the vocal should remain intimate, that you want to preserve the aggressive bass, or that you do not want the master pushed too hard.
This information prevents me from “correcting” something that was actually intentional.
A dark mix is not automatically a bad mix, and a wide stereo image is not automatically something that needs narrowing. Context matters.
11. Tell Me What Bothers You
Just as importantly, explain the problem you hear, even if you do not know the technical term for it.
You can say:
- The chorus becomes tiring when I turn it up.
- The bass sounds too big in my car.
- The vocal feels slightly buried.
- The track sounds dull next to my references.
- The cymbals feel metallic.
- The song seems much quieter than other releases.
You do not need to tell me which EQ frequency to cut or which compressor to use. That is my job.
A clear description of what you hear gives me a better starting point than a list of plugin instructions copied from a mastering tutorial.
12. Be Honest About Processing You Already Applied
If you edited the Suno export in a DAW, used EQ, added saturation, clipped the peaks, changed the stereo width, or processed the track through another mastering tool, let me know.
You do not need to provide an exhaustive plugin list unless something specific matters, but knowing that the source has already been processed helps me understand what I am hearing.
If you can easily export both a processed and cleaner version, sending both can sometimes be useful. The processed version shows me your intended direction, while the cleaner version gives me more flexibility.
13. Check Whether the Song Needs Mixing Before Mastering
This is probably the most important preparation step after choosing the source file.
Listen to the relationship between the vocal, drums, bass, and instruments. If those elements already sit together reasonably well, stereo mastering may be enough to finish the track.
If the vocal is deeply buried, the bass dominates the entire song, or one instrument is much louder than everything around it, the problem belongs inside the mix rather than at the final mastering stage.
Mastering can sometimes reduce the perception of those imbalances, but it cannot directly move the fader of one element inside a completed stereo file.
My article on Suno stems vs stereo mastering explains how I make that decision.
14. If Stems Are Available, Mention Them
You do not need to send stems for every mastering project. In fact, if the stereo mix already works, I generally prefer to keep the workflow simple and master that stereo file.
However, tell me if stems are available when you suspect that one individual element may need substantial correction.
Suno currently provides stem extraction to paid subscribers, with Auto Split supporting up to 12 stems and other split modes giving additional control over individual elements. Suno Studio can also export multitracks for further mixing in another DAW.
If I hear a problem that would be better solved from stems, knowing that they are available makes it much easier to recommend the right workflow.
15. Do Not Process the Stems Individually Just Because You Have Them
More files do not automatically mean you need more processing.
If the Suno stereo mix sounds good and the stems are only available as a backup, leave them alone until there is a reason to use them. Separating a song and rebuilding the mix can introduce unnecessary complexity and may expose separation artifacts that were less noticeable in the original stereo version.
I prefer the simplest path that produces the better result.
16. Check the Beginning and End of the Song
Before sending the file, listen carefully to the first and last few seconds. Check that the beginning is not accidentally clipped, that no unwanted silence or noise appears, and that the ending fades or stops exactly where you want it.
A mastering engineer can certainly create a final fade, but I need to know whether you want one. If the generated song contains an intentional reverb tail, do not cut it off simply because you want the waveform to end neatly.
The musical ending matters more than the visual appearance of the waveform.
17. Check for Obvious Clipping or Distortion
If you hear crackling, flattened peaks, or obvious distortion in loud sections, listen to the original source before sending it. Determine whether the distortion came from the Suno generation itself or from processing that you added afterward.
If your own limiter or clipper created the problem, send me the cleaner version. If the distortion already exists in the Suno export, mention it so I know that it is part of the source.
Some damaged peaks can respond to restoration, while other types of generated distortion are much harder to repair transparently.
18. Do Not Worry About Making the File Loud Enough
Your premaster does not need to compete with Spotify before I receive it. Final loudness is part of the mastering process.
I would rather receive a cleaner track with healthy dynamics than a file that has already been heavily limited simply because you were worried that it sounded quieter than commercial masters.
I will evaluate how much loudness the individual song can tolerate while preserving its punch, clarity, and tonal character.
If you want to understand that process, my guide to Suno loudness and LUFS explains why peak level and perceived loudness are not the same thing.
19. Do Not Master the Track to -14 LUFS Before Sending It
The same principle applies to streaming targets. You do not need to prepare a -14 LUFS version because Spotify uses that value as its Normal playback normalization reference.
Playback normalization and mastering loudness are different decisions. I choose the final loudness according to the genre, arrangement, dynamics, and how the source responds to limiting rather than forcing every track toward the same number.
If you want the full explanation, read my guide to mastering Suno music for Spotify, Apple Music, and streaming.
20. Use Clear File Names
A simple file name prevents confusion, especially when you send more than one version.
Instead of:
finalfinal2NEW.wav
use something clear such as:
Artist - Song Title - Suno Original.wav
If you send another version:
Artist - Song Title - AI Master Reference.wav
or:
Artist - Song Title - Vocal Up Version.wav
Clear naming becomes even more useful when the project later contains revisions and final masters.
21. Include the Correct Song Information
Along with the audio, send the song title and artist name exactly as you want them associated with the project. If you are sending several tracks, label them clearly and mention the intended sequence when it matters.
For an EP or album, tell me which songs belong together because mastering several tracks as one project involves more than making each one loud. I also consider tonal consistency, perceived level, and the relationship between songs.
22. Do Not Send Ten Reference Versions Without Explaining Them
If you experimented with several automatic masters, EQ variations, and loudness settings, you do not need to upload all of them unless they contain information that genuinely helps the project.
Too many unexplained versions can make the intended direction harder to identify.
Send the clean source first, then add one or two additional files only when they demonstrate something specific you want me to hear.
23. You Do Not Need to Remove All Silence Before the Song
A short amount of clean space before the audio begins is not a mastering problem. I can set final start and end points during delivery.
What matters more is avoiding accidental noises, clicks, truncated attacks, or cut reverb tails.
If you deliberately want a particular amount of silence or a specific fade, mention it in your notes.
24. Do Not Change Sample Rate Just for Mastering
If your Suno export is already in a suitable format, there is usually no reason to perform an unnecessary sample-rate conversion before sending it.
Changing 44.1 kHz to 48 kHz does not create additional musical information, just as converting MP3 to WAV does not restore discarded data.
I would rather receive the best original source and handle any necessary delivery conversion at the appropriate stage.
25. Do Not Change Bit Depth Just to Make the File Look More Professional
The same principle applies to bit depth. Converting an existing file into a higher bit-depth container does not recreate original information that was never present.
Modern DAWs perform internal processing at high precision, so I can work safely without you trying to manufacture a “24-bit mastering file” from a lower-resolution source.
Send the original high-quality export whenever possible.
What I Actually Need From You
Despite all the technical discussion around mastering, preparing a Suno song does not need to become complicated. For most projects, the ideal package is straightforward:
- The original Suno WAV whenever available
- The final version of the song
- One or two reference tracks if useful
- A short note describing what you like about the current sound
- A short note describing what you would like improved
- Any alternate master you genuinely want me to hear as a reference
- A note telling me whether stems are available
That gives me enough information to understand both the technical source and your intended direction without forcing you to become a mastering engineer before hiring one.
What You Usually Do Not Need to Do
You generally do not need to normalize the file, reduce it to exactly -6 dBFS, master it to -14 LUFS, convert MP3 to WAV, add a limiter for loudness, change the sample rate, increase the bit depth artificially, or build a mastering chain because you think the engineer expects a partially mastered source.
The cleaner the handoff, the more freedom I have to make the final decisions.
A Simple Suno Mastering Preparation Checklist
- Choose the final and cleanest Suno generation.
- Fix lyrics, arrangement issues, and major generation problems first.
- Download the original WAV whenever available.
- Keep an untouched copy of the source.
- Remove unnecessary automatic mastering or limiting.
- Do not force the file to a specific peak or LUFS target.
- Check whether individual balance problems require stems.
- Choose one or two useful reference tracks.
- Write a short note explaining what you like and what you want improved.
- Use clear file names.
- Send the clean source and any useful reference versions separately.
If you follow those steps, you have already done almost everything I need before I begin mastering.
What Happens After You Send the Track?
When I receive a Suno song, I first listen to the complete source before deciding on the processing chain. I check tonal balance, low-end behavior, harshness, dynamics, peaks, stereo translation, and any artifacts that may become more noticeable once the track is pushed toward final loudness.
I also decide whether mastering is genuinely the correct next stage. If I hear a problem that would be better addressed from stems or through another source edit, I would rather tell you than force the stereo master to compensate for it.
This is the same approach I explain in my complete guide to mastering a Suno song.
Want Me to Master Your Suno Track?
If your song is finished and you want another experienced set of ears on the final sound, I offer professional Suno mastering by a real mastering engineer.
I work from the individual track rather than applying a fixed Suno preset, and I make the mastering decisions manually according to the source, genre, dynamics, tonal balance, and direction you want.
You can also request a free mastering demo using your own song before paying for the complete master, which gives you a practical way to hear what professional mastering can do with the exact file you intend to release.
Final Thoughts
Preparing a Suno track for mastering is mostly about preserving options. Give the mastering engineer the cleanest finished source you have, avoid unnecessary processing that cannot be undone easily, and communicate the sound you want rather than trying to predict every technical decision in advance.
You do not need to deliver a track at -6 dBFS, -14 LUFS, or any other arbitrary number simply because those values appear frequently in mastering tutorials. You also do not need to run the song through automatic mastering first or convert the file into a different format to make it look more professional.
Choose the right generation, send the best source available, explain your intent, and let the mastering stage handle the final balance, dynamics, peaks, translation, and loudness. That gives the engineer more freedom, and it gives your song a better chance of reaching its full potential without unnecessary processing getting in the way.
Frequently Asked Questions
Send the original WAV whenever it is available because it gives the mastering engineer the best source before additional processing. If WAV is not available, send the original MP3 rather than converting the MP3 to WAV and expecting the conversion to improve the audio.
You do not need to reduce the track to an exact value such as -6 dBFS. The important thing is to avoid unintended clipping and unnecessary final limiting. If the clean file peaks at a reasonable level and sounds good, the mastering engineer can adjust gain appropriately inside the session.
If the limiter was added only to make the track louder, I would usually prefer the cleaner version without it. If limiting or clipping is an intentional part of the sound, you can keep it and also send a cleaner version when possible so the engineer can compare both.
Usually, no. Normalization changes gain but does not improve audio quality. The mastering engineer can set the appropriate operating level inside the mastering session.
No. Final loudness is part of the mastering process, and -14 LUFS is not a universal premaster requirement. Send the cleanest finished source rather than limiting it to a streaming normalization reference before mastering.
Yes. If you like something about an automatic master, send it as a reference and explain what you like. Whenever possible, also send the clean original Suno WAV so the mastering engineer has more freedom to create the final master.
You do not need stems when the stereo mix already works. Mention that stems are available if the vocal, bass, drums, or another individual element needs substantial correction because the project may benefit from stem mixing before the final master.
One or two well-chosen references are usually enough. Choose tracks that communicate the tonal balance, vocal position, low-end weight, dynamics, or general presentation you want without overwhelming the engineer with several conflicting directions.
Yes. An MP3 can still be mastered when it is the best source available. I prefer the original WAV for a serious release because it avoids another lossy stage before mastering, but I would rather receive the original MP3 than an MP3 that has simply been converted into WAV.
If the vocal, bass, drums, and instruments already sit together reasonably well, the track may be ready for mastering. If one individual element is clearly too loud, too quiet, too harsh, or otherwise problematic, working from stems usually gives the engineer more useful control before mastering the final stereo mix.
Affiliate disclosure: Some links on this page are affiliate links. If you make a purchase through them, we may earn a commission at no extra cost to you. Brand disclaimer: All product names, trademarks, and brands belong to their respective owners. References are for identification and informational purposes only.
Check Out My Custom Mixing Presets!
New Mixing Presets
Waves Vocal Chains
$24.99Original price was: $24.99.$19.99Current price is: $19.99.FabFilter Pro-Q4 Presets
$24.99Original price was: $24.99.$19.99Current price is: $19.99.FL Studio Vocal Mixing Presets
$19.99Original price was: $19.99.$15.99Current price is: $15.99.FL Studio Mastering Presets
$19.99Original price was: $19.99.$15.99Current price is: $15.99.You may also like to read...
Audio Clipping in Music: Causes, Consequences, and Solutions
Should You Master Your Own Mixes? Pros and Cons
How Do You Know When a Mix Is Finished?
How to Use the 6dB Limiter Trick to Leave Headroom for Mastering
5 Best Limiter VST Plugins for Mixing and Mastering
What Is Headroom for Mastering and Is -6 dB Headroom Enough?