
Audio Plugins, Mastering
10 Essential Tips for Mastering with FabFilter Pro-L2
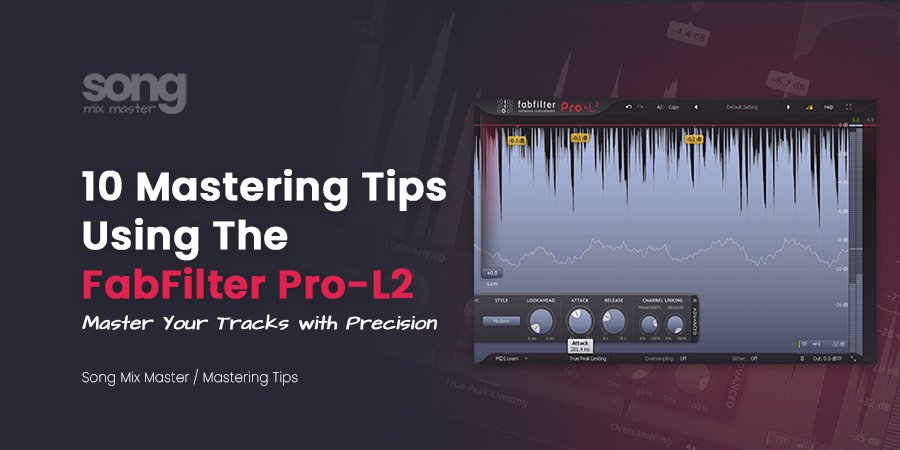
FabFilter Pro-L 2 is one of the best mastering limiters because it gives you precise loudness control, true peak limiting, LUFS metering, multiple limiting styles, oversampling, dithering, channel linking, and detailed visual feedback. The key is not to push it blindly. The goal is to make the master louder while keeping punch, clarity, depth, and emotion intact.
After hours spent mixing, the track can feel finished, but mastering still decides how the final version translates. This is the stage where loudness, true peak safety, final tone, dynamics, and export quality all need to work together.
I use FabFilter Pro-L 2 often because it lets me control the final limiter stage with detail. It is not only a “make it loud” plugin. It helps me understand how the master reacts when I push gain, change limiting styles, adjust attack and release, enable true peak limiting, or prepare the final export.
In this guide, I’ll share my most practical tips for mastering with FabFilter Pro-L 2. I’ll focus on what actually matters: loudness readouts, waveform feedback, true peak control, limiting styles, lookahead, attack and release, channel linking, auto gain, oversampling, and dithering.
For a broader limiter comparison, read my guide on the best limiter plugins for mixing and mastering .
1. Understand the Loudness Readouts
The first thing I check in FabFilter Pro-L 2 is the loudness information. A limiter can make the track louder, but the loudness readouts tell me how far I am actually pushing the master.
LUFS are useful because they measure perceived loudness over time. True peak tells me how close the master may get to inter-sample clipping. Gain reduction tells me how hard the limiter is working. I never judge the master from one number alone. I look at all of these values together while listening to the song.
The mistake many producers make is chasing a fixed LUFS target. A master can hit a target and still sound harsh, flat, or over-limited. I use Pro-L 2’s loudness readouts to confirm what I hear, not to replace my ears.
For a deeper loudness explanation, read my guide on what LUFS are and why they matter in mastering .
2. Use the Waveform Visualization to See Limiting Behavior
FabFilter Pro-L 2 gives you a useful waveform display that helps you see how the limiter reacts to peaks and loud sections. I do not mix or master with my eyes, but this visual feedback can quickly reveal whether the limiter is working gently or constantly shaving the track.
When the waveform shows heavy limiting all the time, I know the master may be losing movement. When only the loudest peaks trigger limiting, the result usually feels more natural. This is especially important with drums, vocals, 808s, and dense choruses.
The waveform can also help you identify sections that trigger the limiter too hard. Sometimes the problem is not the limiter setting. Sometimes one kick, bass note, vocal peak, or harsh cymbal pushes the whole limiter stage too aggressively.
3. Enable True Peak Metering and True Peak Limiting
True peak metering is one of the most important features in a mastering limiter. Normal sample peak meters can miss inter-sample peaks that happen during playback, conversion, or encoding. True peak metering helps protect the master from distortion after export.
When I master for streaming, I usually keep a true peak ceiling around -1 dBTP. For louder masters, more margin can sometimes help reduce encoding distortion. This depends on the song, loudness level, genre, and delivery goal.
True peak limiting can sound slightly different from normal limiting because the limiter works harder to prevent inter-sample peaks. That is why I always listen when I enable it. If the master loses punch, I adjust the limiter, the clipping stage before it, or the low-end control earlier in the chain.
True peak safety is not about making the master weak. It is about protecting the final file.
4. Choose the Right Limiting Style
The limiting style in Pro-L 2 changes how the limiter behaves. This matters because one style may keep drums punchy, while another may sound smoother, louder, safer, or more aggressive.
I usually start with Modern because it gives a clean and balanced result on many tracks. From there, I compare other styles based on the song. I do not choose a mode because the name sounds right. I choose it because it reacts better to the mix.
Here is how I think about the main styles in a practical mastering workflow:
- Transparent: useful when I want minimal coloration, but it can still distort if pushed too far.
- Punchy: useful when the track needs more impact or forward energy.
- Dynamic: useful when I want to preserve transients and movement.
- Rounded: useful when I want smoother limiting with less aggressive edge.
- Aggressive: useful for dense, loud styles, but it needs careful listening.
- Modern: my usual starting point because it often sounds clean and controlled.
- Bus: useful on buses or groups, but it can also be tested in mastering when the song needs cohesion.
- Safe: useful when distortion prevention matters more than maximum loudness.
The Solo function is useful because it helps you hear what the limiter is removing or changing. When you hear the limiter working too aggressively, you can back off before the master becomes smaller or harsher.
5. Adjust Lookahead Carefully
Lookahead allows the limiter to react before peaks fully arrive. More lookahead can make limiting safer and smoother. Less lookahead can feel more immediate and aggressive, but it can also increase distortion if the limiter cannot react cleanly.
I do not use one lookahead value for every master. For punchy modern tracks, I may keep the lookahead lower to preserve transient energy. For smoother material, I may allow more lookahead if it helps reduce distortion.
The best test is the kick, snare, vocal peaks, and chorus impact. If the limiter starts softening the drums too much, I adjust. If the master starts distorting on peaks, I adjust again. The right lookahead setting is the one that protects the sound without removing its impact.
6. Fine-Tune Attack and Release
Attack and release decide how the limiter reacts and recovers. These settings can change the whole feel of the master. Too fast, and the limiter can reduce punch or create distortion. Too slow, and the track may feel flat or unable to recover between hits.
I often adjust attack to protect the transients. When the attack feels too fast, drums and percussion can lose impact. When it is too slow, peaks may become harder to control. The release needs to breathe with the groove. If it is too fast, the limiter can pump. If it is too slow, the whole track can feel held down.
These are starting points, not rules:
| Style | Attack Starting Point | Release Starting Point |
|---|
| Pop and rock | 10 to 20 ms | 50 to 150 ms |
| EDM and hip-hop | 0 to 10 ms | 10 to 80 ms |
| Classical and jazz | 20 to 30 ms | 150 to 300 ms |
| Acoustic and folk | 10 to 20 ms | 100 to 200 ms |
After setting attack and release, I always listen to the loudest section. If the chorus becomes smaller, the limiter is not helping. If the drums stay alive and the master gets louder without obvious damage, the settings are moving in the right direction.
7. Use Channel Linking to Protect the Stereo Image
Channel linking controls how the limiter treats the left and right channels. This can affect stereo width, image stability, and transient behavior.
When linking is high, both channels react more together. This can keep the stereo image stable. When linking is lower, the limiter can react more independently to peaks on one side. This can preserve width and transient detail, but if pushed too far, it can make the image feel unstable.
I often start with transient linking around the middle and release linking higher. This can preserve some stereo movement while keeping the master from shifting unnaturally. The best setting depends on the mix. A wide electronic track may need different linking than a dense rock mix or acoustic song.
8. Use Auto Gain for Fair Comparisons
Louder almost always sounds better at first. This is one of the biggest traps in mastering. You push the gain, the track gets louder, and your brain says it sounds better. But sometimes it is only louder, not actually better.
Auto Gain helps you compare limiting decisions more fairly. It compensates level changes so you can judge the tone, punch, distortion, and movement instead of being fooled by volume.
I still level-match manually when needed, but Auto Gain can help during quick decisions. The key question is simple: does the limiter improve the master when the level is matched, or does it only impress you because it got louder?
9. Use Oversampling During Final Export
Oversampling can reduce artifacts that appear when limiting creates fast changes in the signal. Higher oversampling can sound smoother and cleaner, especially on loud masters, but it also uses more CPU.
I do not always monitor with high oversampling during the full session because it can increase CPU load. For final export, I often test higher oversampling settings and compare the result. Sometimes it helps. Sometimes the difference is small. Sometimes lower settings feel a little more direct.
The important point is to test it in context. Do not choose 32x only because it looks more professional. Choose the setting that makes the final master sound cleaner without changing the feel in a way you dislike.
For related technical context, read my guide on 44.1 kHz vs 48 kHz sample rate .
10. Use Dither Only When Reducing Bit Depth
Dither is important, but only in the right situation. I use dithering when I reduce bit depth, such as exporting a 24-bit master down to 16-bit for CD delivery. I do not add dither randomly to every export.
Dither should happen at the final stage after all processing, level changes, limiting, and fades. If you add processing after dither, you defeat the purpose because you change the signal again.
For streaming and digital distribution, 24-bit WAV delivery is common, so you may not need to dither to 16-bit unless the release format requires it. Always match the dither setting to the final delivery format.
For a deeper explanation, read my guide on what dithering is in digital audio .
My Practical FabFilter Pro-L 2 Mastering Checklist
Before I print the final master, I check the limiter style, gain reduction, loudness, true peak ceiling, attack, release, lookahead, channel linking, oversampling, dither, and output level. I also compare the master against the unmastered mix and reference tracks at a matched playback level.
Here is the core checklist I use:
- Do not push loudness before the mix is ready.
- Use true peak metering to avoid inter-sample clipping.
- Choose the limiting style by listening, not by name.
- Keep gain reduction musical, not constant and destructive.
- Adjust attack and release so the groove still moves.
- Use oversampling during final export when it improves the sound.
- Use dither only when reducing bit depth.
- Compare level-matched so loudness does not fool your ears.
For more mastering loudness strategy, read my guide on mastering loudness without destroying your track .
Common Mistakes When Using FabFilter Pro-L 2
The first mistake is using Pro-L 2 only as a loudness button. It is a powerful limiter, but if the mix has too much low-end energy, harsh upper mids, or weak transients, the limiter will reveal those problems quickly.
The second mistake is ignoring true peak. A master can look safe on a normal peak meter and still create distortion after encoding or playback conversion.
The third mistake is pushing one limiter too hard. Sometimes a cleaner result comes from controlling peaks earlier with EQ, saturation, clipping, compression, or mix revision before Pro-L 2.
The fourth mistake is adding dither when it is not needed. Dither is not a magic quality button. It has a specific job during bit-depth reduction.
The fifth mistake is mastering to one fixed LUFS number. Use LUFS as a guide, but master for the song.
Final Thoughts on Mastering With FabFilter Pro-L 2
FabFilter Pro-L 2 is one of the most useful limiters for modern mastering because it gives you control, metering, flexibility, and transparency in one plugin. But the quality of the master still depends on your decisions.
Use the limiter to protect the output, shape loudness, control peaks, and prepare the final file. Do not use it to hide mix problems or chase a number at the expense of sound quality.
A strong master should feel louder, clearer, more controlled, and more finished without losing punch or emotion. Pro-L 2 can help you get there when you use it with discipline.
You can also read my guide on understanding RMS and LUFS in audio mastering for more loudness context.
Affiliate disclosure: Some links on this page are affiliate links. If you make a purchase through them, we may earn a commission at no extra cost to you. Brand disclaimer: All product names, trademarks, and brands belong to their respective owners. References are for identification and informational purposes only.
Check Out My Custom Mixing Presets!
New Mixing Presets
Waves Vocal Chains
$24.99Original price was: $24.99.$19.99Current price is: $19.99.FabFilter Pro-Q4 Presets
$24.99Original price was: $24.99.$19.99Current price is: $19.99.FL Studio Vocal Mixing Presets
$19.99Original price was: $19.99.$15.99Current price is: $15.99.FL Studio Mastering Presets
$19.99Original price was: $19.99.$15.99Current price is: $15.99.You may also like to read...
My Review Of The Oeksound Soothe 2 Audio Plugin
Unveiling the Magic: The Art and Science of Music Mastering
Building The Best Music Production PC For 2026
10 Warm Up Singing Exercises to Improve Your Vocal Performance
How to Mix a Kick Drum for Punch, Weight and Clarity
Should You Master Your Own Mixes? Pros and Cons