
Audio Plugins, Mastering
Best Glue Compressor Plugins for Mastering and Mix Bus
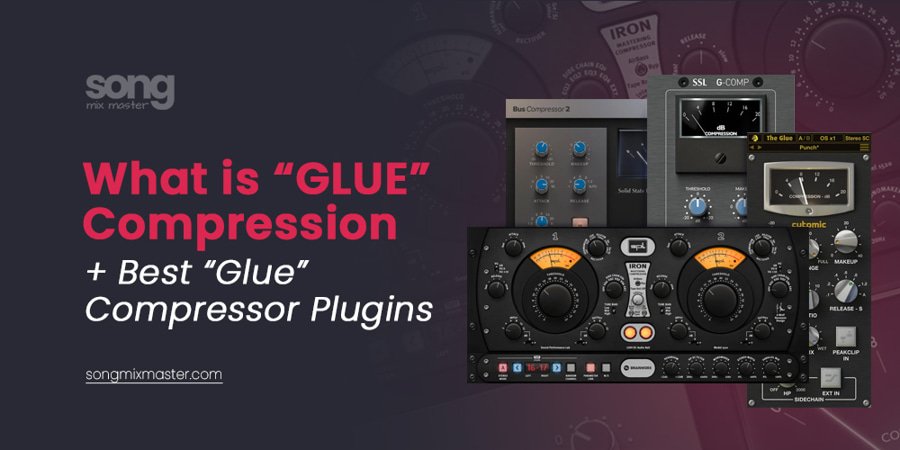
Glue compression is a subtle mix bus or mastering compression technique that helps the whole track feel more connected, controlled, and polished. The best glue compressor plugins usually add cohesion without crushing transients, flattening dynamics, or making the mix sound smaller.
When I use glue compression, I am not trying to make the track louder. I am trying to make the mix breathe as one piece of music. A good glue compressor can make the drums feel more connected to the bass, the vocal sit better inside the instrumental, and the whole stereo mix feel slightly more finished before limiting.
The danger is overdoing it. Too much bus compression can remove punch, pull the chorus down, blur the low end, and make the master feel lifeless. Glue compression works best when it is subtle. In mastering, even 1 or 2 dB of gain reduction can change the feel of the entire song.
In this guide, I’ll explain what glue compression is, how it differs from normal compression, what settings I usually start with, and which glue compressor plugins I would actually consider for mastering, mix bus compression, and professional stereo bus work.
What Is Glue Compression?
Glue compression is a compression technique used on a group, bus, mix bus, or master bus to make different elements feel more connected. Instead of controlling one vocal, one snare, or one bass track, a glue compressor reacts to a larger part of the mix.
On the mix bus, glue compression can gently reduce the dynamic difference between sections and make the track feel more cohesive. On a drum bus, it can make the kick, snare, hats, percussion, and room elements move together. On a vocal bus, it can help lead vocals, doubles, harmonies, and ad-libs feel more controlled.
In mastering, glue compression must be handled with extra care because the compressor affects the entire stereo mix. If the compressor reacts too hard to the kick or bass, the whole master can pump. If the attack is too fast, the transients can lose energy. If the release is wrong, the groove can feel unstable.
Glue Compressor vs Normal Compressor
A normal compressor can control the dynamics of an individual track, such as a vocal, kick, bass, guitar, or snare. A glue compressor usually works across a bus or full mix to create cohesion.
| Compressor Use | Main Purpose | Typical Placement |
|---|---|---|
| Track compression | Control one sound source | Vocal, bass, kick, snare, guitar |
| Bus compression | Control and connect a group | Drum bus, vocal bus, music bus |
| Glue compression | Make elements feel unified | Mix bus, master bus, drum bus |
| Mastering compression | Shape the full stereo master carefully | Mastering chain |
The difference is not only the plugin. It is the purpose. You can use the same compressor as a normal compressor or a glue compressor depending on where you place it and how gently you set it.
If you want a broader foundation, read my guide on the role of compressor plugins in audio mixing and mastering.
What Is a VCA Compressor?
A VCA compressor uses a voltage-controlled amplifier design to control gain. In plugin form, many VCA compressors emulate the behavior of classic hardware units known for speed, punch, and control.
VCA compressors are popular for glue compression because they can react quickly without sounding too soft or slow. SSL-style bus compressors are probably the most famous example. They can add punch, movement, and cohesion when used subtly on a mix bus or drum bus.
That does not mean every glue compressor must be VCA. Variable-mu compressors, transparent digital compressors, saturation compressors, and multiband designs can also create glue. The right choice depends on the song.
My Starting Settings for Glue Compression
Before looking at the plugins, I want to give you the starting point I actually use. These are not fixed rules, but they help prevent the most common mistake: over-compressing the mix bus.
- Gain reduction: usually 1 to 2 dB for mastering, sometimes 2 to 4 dB on a mix bus if the song can handle it.
- Ratio: 2:1 for subtle glue, 4:1 when I want a stronger SSL-style grab.
- Attack: 10 ms to 30 ms when I want to keep transients alive.
- Release: Auto or around 0.1 to 0.3 seconds, depending on groove and tempo.
- Sidechain high-pass filter: often around 80 Hz to 150 Hz so the kick and bass do not over-trigger compression.
- Level matching: always compare input and output at the same loudness.
The most important setting is not the ratio or attack. It is the amount of gain reduction. If the compressor makes the song feel smaller, slower, or less emotional, back off.
Best Glue Compressor Plugins for Mastering and Mix Bus Compression
Here are my favorite glue compressor plugins and bus compressor options, including SSL-style compressors, mastering compressors, transparent compressors, and creative glue tools. I kept the list broad because different songs need different types of movement.
1. Waves SSL G-Master Buss Compressor

The Waves SSL G-Master Buss Compressor is one of the most recognizable SSL-style glue compressors. It gives the mix that familiar bus compression movement, with punch, grab, and cohesion when you use it carefully.
I like it when I want a classic SSL-style mix bus sound without overcomplicating the chain. It can work on pop, hip-hop, rock, EDM, and many modern mixes, but you need to watch the low end. If the kick drives the compressor too hard, the whole mix can pump.
My starting settings:
- Ratio: 2:1 for subtle glue, 4:1 for stronger bus compression.
- Attack: 10 ms or 30 ms if I want to keep punch.
- Release: Auto or 0.3 seconds.
- Gain reduction: 1 to 2 dB for mastering, up to 4 dB on a mix bus if it still grooves.
- Make-up gain: level-match the output so louder does not trick your judgment.
Best for: classic SSL-style glue, punchy mix bus compression, and fast cohesion.
Buy at Waves: SSL G-Master Buss Compressor
2. bx_townhouse Buss Compressor

The bx_townhouse Buss Compressor has an SSL-inspired character but feels slightly different from a standard clean bus compressor. It can add density, movement, and attitude, which makes it useful when the mix needs more personality.
I like it on rock, electronic music, drums, and mixes that need more analog-style push. For mastering, I keep it gentle. For mixing, I may push it harder if the song benefits from that energy.
My starting settings:
- Ratio: 2:1 or 4:1.
- Attack: 10 ms to let transients pass.
- Release: Auto or 0.3 seconds.
- Gain reduction: 1 to 2 dB for mastering, 2 to 4 dB for mix bus flavor.
- Sidechain high-pass filter: around 100 Hz to 150 Hz if the low end triggers too much compression.
- Dry/Wet: useful for parallel-style glue when 100% wet feels too heavy.
Best for: analog-style glue, stronger bus character, and punchy master bus control.
Buy at Plugin Boutique: bx_townhouse Buss Compressor
3. Lindell SBC

Lindell SBC is a flexible bus compressor with a strong analog-inspired feel. It can add weight and cohesion without sounding sterile, which makes it useful when I want the mix to feel more finished and slightly more expensive.
I would not use it only because it is “warm.” I would use it when the song needs subtle density and smoother movement. It can be a good choice on a music bus or mix bus when a cleaner digital compressor feels too neutral.
My starting settings:
- Ratio: 2:1 for subtle glue.
- Attack: 30 ms to 50 ms when I want to preserve transients.
- Release: Auto or 200 ms to 400 ms.
- Gain reduction: 1 to 3 dB.
- Output: level-match before deciding if it is helping.
Best for: warm bus compression, smooth density, and subtle analog-style cohesion.
4. SPL Iron

SPL Iron is not the typical SSL-style glue compressor. It has a variable-mu-inspired mastering character that can feel smoother, wider, and more polished. I reach for this type of compressor when I want musical movement instead of fast VCA punch.
It can work beautifully on mastering chains where the mix already has good transient control and needs a final sense of elegance. It is also useful when a VCA compressor feels too grabby or too obvious.
My starting settings:
- Ratio: gentle settings for mastering-style movement.
- Attack: medium or slower to preserve punch.
- Release: medium or program-dependent if the song needs smooth recovery.
- Gain reduction: usually 1 to 2 dB.
- Sidechain high-pass filter: use it if the low end pulls the mix down.
- Mix control: blend carefully if full compression feels too heavy.
Best for: mastering warmth, smooth glue, and polished stereo bus movement.
Buy at Plugin Boutique: SPL Iron
5. SSL Native Bus Compressor 2

SSL Native Bus Compressor 2 gives you the SSL bus compressor sound with a modern plugin workflow. It is a strong choice if you want authentic SSL-style glue with clean controls and a polished interface.
I like SSL-style compressors when the song needs punch and cohesion at the same time. The danger is using too much compression because the sound feels exciting at first. On a full mix, I usually want the compressor to move, not dominate.
My starting settings:
- Ratio: 2:1 for mastering, 4:1 for stronger mix bus glue.
- Attack: 10 ms or 30 ms.
- Release: Auto or 0.3 seconds.
- Sidechain high-pass filter: around 100 Hz to 150 Hz if needed.
- Gain reduction: 1 to 2 dB for mastering, slightly more for mix bus tone.
Best for: authentic SSL glue, punchy stereo bus compression, and polished mix bus control.
Buy at Plugin Boutique: SSL Native Bus Comp
6. Cytomic The Glue

Cytomic The Glue is one of the most popular SSL-style bus compressor plugins, and the name fits the purpose. It can sound punchy, clear, and controlled when used with restraint.
I like The Glue because it can work on a full mix, drum bus, electronic music bus, or aggressive modern production. The Range control is useful because it lets you limit how much compression can happen, which helps prevent over-compression.
My starting settings:
- Ratio: 2:1 or 4:1.
- Attack: 10 ms to 30 ms.
- Release: Auto or 0.3 seconds.
- Range: use it to stop the compressor from grabbing too much.
- Sidechain high-pass filter: around 100 Hz to 150 Hz when needed.
- Wet/Dry: blend if full compression feels too obvious.
Best for: SSL-style punch, mix bus glue, drum bus compression, and controlled movement.
7. SSL G Comp Bus Compressor

SSL G Comp Bus Compressor is another strong option if you want the classic SSL bus compression feel. This style of compressor has become a reference point for glue because it can make a mix feel tighter without obviously changing every element.
For mastering, I keep it gentle. For mixing, I may use it earlier on the mix bus and mix into it so the compressor becomes part of the sound from the beginning.
My starting settings:
- Ratio: 2:1 or 4:1.
- Attack: 10 ms or 30 ms.
- Release: Auto or 0.3 seconds.
- Gain reduction: 1 to 2 dB for subtle glue.
- Make-up gain: match the output level to avoid loudness bias.
Best for: traditional SSL stereo bus glue and mix bus polish.
8. Ableton Live Glue Compressor

Ableton Live Glue Compressor is built into Ableton Live and gives producers a simple SSL-style bus compression tool. It is especially useful for electronic producers who want fast drum bus or mix bus cohesion without opening a third-party plugin.
The Soft Clip option can add extra density, but I would use it carefully on a full mix. It can help some electronic tracks feel louder and tighter, but it can also reduce transient clarity if pushed too far.
My starting settings:
- Ratio: 2:1 or 4:1.
- Attack: 10 ms or 30 ms.
- Release: Auto.
- Gain reduction: 1 to 3 dB depending on the bus.
- Soft Clip: use carefully and compare level-matched.
Best for: Ableton users, electronic music, drum bus glue, and quick SSL-style compression.
9. FabFilter Pro-C 2

FabFilter Pro-C 2 is not a dedicated SSL bus compressor, but its Bus mode makes it very useful for glue compression. I like it when I need precision, visual feedback, sidechain EQ, clean gain staging, and flexible compression behavior.
This is one of the best choices when I want control more than analog character. It can work well on vocals, drums, mix bus, and even subtle mastering compression when used carefully.
My starting settings:
- Style: Bus mode.
- Ratio: 2:1 for subtle glue.
- Attack: 10 ms to 30 ms.
- Release: Auto or 200 ms to 400 ms.
- Knee: soft knee for smoother compression.
- Sidechain EQ: high-pass around 100 Hz to 150 Hz if the low end triggers too much compression.
- Gain reduction: 1 to 2 dB for mastering-style glue.
Best for: clean bus compression, visual control, sidechain precision, and modern mastering workflows.
If you want to understand soft knee behavior better, read my guide on what the knee control does in audio compression.
Buy at Plugin Boutique: FabFilter Pro-C 2
10. FL Studio Fruity Compressor and Fruity Limiter

FL Studio Fruity Compressor and Fruity Limiter do not directly emulate an SSL G bus compressor, but you can still use them for basic glue compression if you understand the settings.
This is useful for producers who want to learn bus compression with stock tools before buying dedicated plugins. The main limitation is that you need to listen carefully and avoid pushing the compressor too hard.
My starting settings:
- Ratio: 2:1 to 4:1.
- Attack: 10 ms to 30 ms.
- Release: adjust until the groove breathes naturally.
- Gain reduction: 1 to 3 dB.
- Make-up gain: level-match with the bypassed signal.
Best for: FL Studio users, stock-plugin workflows, beginner bus compression practice, and simple glue.
If you work in FL Studio, you may also like my guide on top-down mixing in FL Studio.
11. UAD SSL 4000 G Bus Compressor

UAD SSL 4000 G Bus Compressor is another SSL-style bus compressor that works well when you want classic glue and punch. It can feel familiar if you like the movement of SSL-style master bus compression.
I would use it when I want bus compression that feels musical but still firm. Like every SSL-style compressor, the key is not to let the kick and bass control the whole mix too much.
My starting settings:
- Ratio: 2:1 or 4:1.
- Attack: 10 ms or 30 ms.
- Release: Auto or 0.3 seconds.
- Gain reduction: 1 to 2 dB for mastering, more only if the mix can handle it.
- Make-up gain: match input and output levels.
Best for: UAD users, SSL-style glue, punch, and classic mix bus movement.
12. Tokyo Dawn Labs TDR Kotelnikov

TDR Kotelnikov is a transparent digital compressor that can work very well for mastering when I do not want obvious color. It does not try to sound like an SSL compressor, and that is exactly why it is useful.
If the mix already has character and only needs controlled movement, Kotelnikov can be a smart choice. It can smooth dynamics while keeping the tone clean and natural.
My starting settings:
- Ratio: 1.5:1 to 2:1 for mastering-style control.
- Attack: 30 ms to 50 ms.
- Release: Auto or 200 ms to 400 ms.
- Gain reduction: 1 to 2 dB.
- Knee: softer settings for transparency.
Best for: transparent mastering compression, clean control, and subtle stereo bus movement.
13. PSP Audioware VintageWarmer2

PSP VintageWarmer2 is more than a normal compressor. It brings compression, limiting, and saturation-style density together. That makes it useful when the mix needs warmth and glue, but it also means you need to avoid overprocessing.
I like this kind of tool when the song needs thickness or vintage-style density. I would not use it when the mix already feels dark, crowded, or saturated.
My starting settings:
- Compression: gentle gain reduction, around 1 to 3 dB.
- Drive: increase carefully for warmth, not obvious distortion.
- Release: adjust until the groove moves naturally.
- Output: level-match so saturation does not fool your ears.
Best for: warm glue, saturation density, vintage-style bus tone, and thicker mixes.
Quick Comparison: Which Glue Compressor Should You Choose?
| Plugin | Best Use | Character |
|---|---|---|
| Waves SSL G-Master Buss | Classic mix bus glue | Punchy SSL-style |
| bx_townhouse Buss Compressor | Character glue | Analog and energetic |
| Lindell SBC | Warm bus control | Thick and smooth |
| SPL Iron | Mastering polish | Smooth and musical |
| SSL Native Bus Compressor 2 | Authentic SSL bus compression | Clean SSL glue |
| Cytomic The Glue | Mix bus and drum bus glue | Punchy and controlled |
| Ableton Glue Compressor | Ableton stock workflow | Simple and effective |
| FabFilter Pro-C 2 | Precise modern glue | Clean and flexible |
| TDR Kotelnikov | Transparent mastering compression | Clean and natural |
| PSP VintageWarmer2 | Warmth and density | Saturated and thick |
How Much Glue Compression Should You Use in Mastering?
In mastering, I usually stay conservative. A full stereo mix does not need heavy compression to feel glued. Most of the time, 1 to 2 dB of gain reduction is enough. If I need more, I ask myself why. Maybe the mix is not balanced. Maybe the low end is too dynamic. Maybe the vocal jumps too much. Maybe I need clip gain, EQ, or mix revision instead of more compression.
For mix bus compression, I can sometimes use more gain reduction if I mix into the compressor from the beginning. But placing a compressor on a finished mix and forcing it to work too hard can change the entire balance.
The best test is simple: bypass the compressor and level-match the output. If the compressed version feels more connected without losing punch, it is working. If it only sounds better because it is louder, it is not a fair improvement.
Common Glue Compression Mistakes
The biggest mistake is using too much gain reduction. Glue compression should bring the mix together, not squeeze the life out of it.
Another mistake is using an attack that is too fast. Fast attack can reduce punch because the compressor catches transients before they speak. Sometimes this works creatively, but on the mix bus it often makes the track feel smaller.
A third mistake is ignoring the release time. If the release is too fast, the compressor can pump. If it is too slow, the mix may not recover before the next hit. The release should move with the groove.
The fourth mistake is letting the low end trigger too much compression. If the kick or bass pulls down the whole mix, use a sidechain high-pass filter or fix the low-end balance before compression.
The final mistake is not level-matching. Louder almost always sounds better at first. Always compare fairly.
My Favorite Glue Compressor Choice
If I had to choose one classic glue compressor sound, I would still reach for an SSL-style bus compressor first. The Waves SSL G-Master Buss, Cytomic The Glue, SSL Native Bus Compressor 2, UAD SSL 4000 G Bus Compressor, and Ableton Glue Compressor all live in that family of punchy bus compression.
For cleaner mastering compression, I like transparent tools such as TDR Kotelnikov or precise compressors like FabFilter Pro-C 2. For warmth and color, SPL Iron, Lindell SBC, bx_townhouse, and PSP VintageWarmer2 can add more character.
The best glue compressor depends on what the mix needs. A clean pop mix may need subtle SSL movement. A rock track may need stronger bus energy. A warm soul or cinematic mix may need smoother compression. A modern master may need almost no glue compression at all.
If you want a focused SSL workflow, read my guide on how to glue your mix using the Waves SSL Bus Compressor.
Final Thoughts on the Best Glue Compressor Plugins
Glue compression can make a mix feel more professional when you use it with taste. It can add cohesion, polish, movement, and control. But it can also damage the mix if you push it too hard.
My advice is simple. Start subtle. Level-match everything. Protect the transients. Use a sidechain high-pass filter when the low end over-triggers the compressor. Choose the compressor for the song, not because someone called it the best.
A great glue compressor does not make the listener hear compression. It makes the listener feel that the song belongs together.
If you want help turning your mix into a polished master, you can check my online audio mastering service. I can help you control dynamics, glue the mix, preserve punch, and prepare the final version for release.
FAQ About Glue Compressor Plugins
Glue compression is a subtle compression technique used on a bus, mix bus, or master bus to make multiple elements feel more connected. It helps the mix sound more cohesive without making the compressor obvious.
There is no single best glue compressor plugin for every mix. SSL-style compressors such as Waves SSL G-Master Buss, Cytomic The Glue, SSL Native Bus Compressor 2, and UAD SSL 4000 G Bus Compressor are popular for classic glue. Transparent tools like TDR Kotelnikov and FabFilter Pro-C 2 can work better when you need cleaner control.
For mastering, 1 to 2 dB of gain reduction is often enough. For mix bus compression, 2 to 4 dB can work if the song still keeps its punch and movement. If the mix starts sounding smaller, use less compression.
You can use glue compression on the master bus if it improves cohesion without damaging punch, dynamics, or tonal balance. Keep it subtle and always compare the compressed version with the bypassed version at the same loudness.
Yes. SSL-style bus compressors are famous for glue compression because they can add punch, movement, and cohesion to a mix. They work especially well when used gently on the mix bus, drum bus, or stereo bus.
A good starting point is an attack around 10 ms to 30 ms and a release set to Auto or around 0.1 to 0.3 seconds. The attack should preserve transients, and the release should move naturally with the groove of the song.
Yes. Too much glue compression can flatten transients, reduce punch, create pumping, blur the low end, and make the master feel smaller. In mastering, subtle compression usually works better than heavy gain reduction.
Affiliate disclosure: Some links on this page are affiliate links. If you make a purchase through them, we may earn a commission at no extra cost to you. Brand disclaimer: All product names, trademarks, and brands belong to their respective owners. References are for identification and informational purposes only.
Check Out My Custom Mixing Presets!
New Mixing Presets
Waves Vocal Chains
$24.99Original price was: $24.99.$19.99Current price is: $19.99.FabFilter Pro-Q4 Presets
$24.99Original price was: $24.99.$19.99Current price is: $19.99.FL Studio Vocal Mixing Presets
$19.99Original price was: $19.99.$15.99Current price is: $15.99.FL Studio Mastering Presets
$19.99Original price was: $19.99.$15.99Current price is: $15.99.You may also like to read...
The Rise of DIY Music: How Independent Artists Can Thrive
My Review Of The Oeksound Soothe 2 Audio Plugin
Top-Down Mixing in FL Studio: PRO Mixing Techniques
Top 5 Mistakes When Using Reverb in Audio Mixing
7 Steps to the Perfect Mix in Hip-Hop, Techno, Rock, and Pop
My Buyer’s Guide for Professional Studio Headphones