
Audio Plugins, Mixing
How To Mix Hip-Hop Vocals in FL Studio Using Stock Plugins
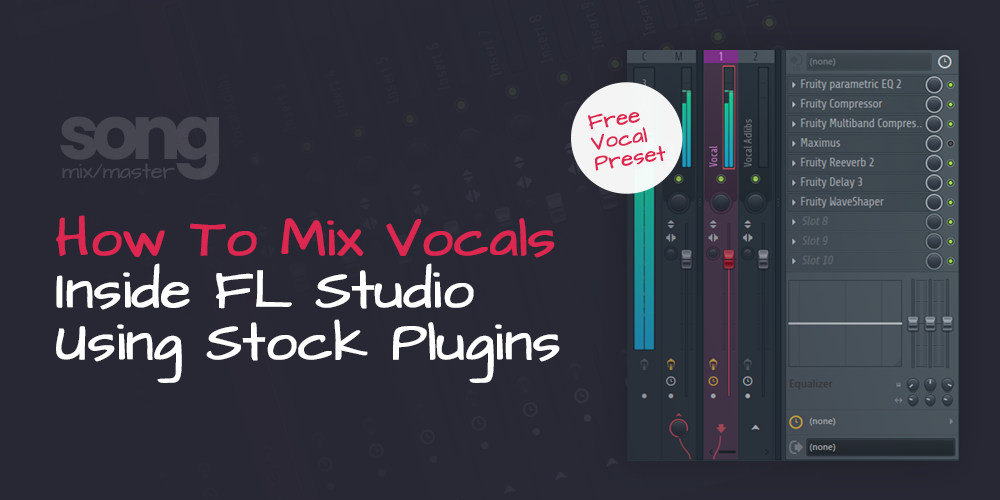
FL Studio, renowned for its versatility and user-friendly interface, stands as a powerful digital audio workstation (DAW) for mixing and producing various music genres, including Hip-Hop. This comprehensive guide will delve into the intricacies of mixing Hip-Hop vocals in FL Studio, focusing on using stock plugins to achieve professional-sounding results.
At the end of this article, you will be able to download the vocal preset and you can apply directly in your FL Studio as a starting point for your vocal tracks.
Setting the Foundation
Before diving into the details of individual plugins, it’s crucial to establish a solid foundation for your vocal recording:
- Quality Recording: Ensure a well-recorded vocal track with minimal background noise. Utilize a pop filter and high-quality microphone to capture a clean, clear signal.
- Organization: Organize your FL Studio project by color-coding and labeling tracks. This makes navigation and editing more efficient as you progress through the mixing process.
Stock FL Studio Plugins for Hip-Hop Vocal Mixing
1. EQ (Parametric EQ 2)

The Parametric EQ 2 is a powerful stock plugin that allows precise sculpting of the vocal frequency spectrum. Address any unwanted resonances or enhance desired frequencies to shape the vocal tone.
Settings:
- High-pass filter to eliminate low-end rumble.
- Notch out any frequencies causing muddiness (typically around 200-300 Hz).
- Enhance presence and warmth by boosting frequencies in the 5 kHz to 10 kHz range.
2. Compression (Fruity Limiter)

Compression is a dynamic processing tool that regulates the dynamic range of the vocal, reducing the difference between loud and soft parts. Fruity Compressor is versatile and can serve various purposes in vocal mixing.
Settings:
- Ratio: Determines the degree of compression applied once the signal exceeds the threshold. A ratio of 2:1 or 3:1 is a good starting point for vocal compression.
- Attack: Dictates how quickly compression engages after the input signal surpasses the threshold. For vocals, a fast attack (around 0-10 ms) will control dynamics very well.
- Release: Governs how long compression persists after the input signal drops below the threshold. Opt for a release time that complements the tempo of the track, generally between 50-100 ms.
- Threshold: This sets the level at which compression begins. For vocals, start with a conservative threshold to capture louder sections without overly affecting softer nuances.
3. De-Essing (Fruity De-Esser):
De-Essing with Fruity Multiband Compressor

Multi-band compression allows us to selectively compress the sibilant frequencies (typically between 4,000~12,000 Hz) without affecting the entire vocal spectrum. When configured with the correct threshold and ratio settings, the compression reacts dynamically to sibilant peaks, only activating when they exceed an acceptable level.
Unlike EQ, which uniformly cuts frequencies across the entire track, multi-band compression retains the natural tonal qualities of the vocals while addressing sibilance issues.
Settings:
- Open Fruity Multiband Compressor: Load the Fruity Multiband Compressor onto the vocal track.
- Select Mode: Choose the Mid band for peaking de-essing or the High band for shelving de-essing, based on your preference.
- Adjust Threshold and Ratio: Set the threshold to a level where it captures the sibilant frequencies without affecting the rest of the vocal. Adjust the ratio for a controlled compression effect.
- Fine-Tune Frequency Range: Use the band controls to narrow down the frequency range you want to target for de-essing.
De-Essing with Maximus

Settings:
- Open Maximus: Insert Maximus onto the vocal track.
- Choose Peaking or Shelving: In Maximus, set the band to either Mid for peaking or High for shelving, aligning with your de-essing preference.
- Adjust Threshold and Ratio: Like the Fruity Multiband Compressor, configure the threshold and ratio to achieve effective de-essing.
- Fine-Tune with Band Controls: Utilize the band controls in Maximus to refine the frequency range you want to focus on, ensuring surgical precision in your de-essing.
4. Reverb (Fruity Reverb 2)

Fruity Reverb 2 offers a versatile environment for adding space to your vocals. Tailor the reverb settings to fit the vibe of your Hip-Hop track.
Settings:
- Adjust decay time for the desired reverb length.
- Experiment with pre-delay to create a sense of depth.
- Use the wet/dry mix to control the amount of reverb applied.
5. Delay (Fruity Delay 3)
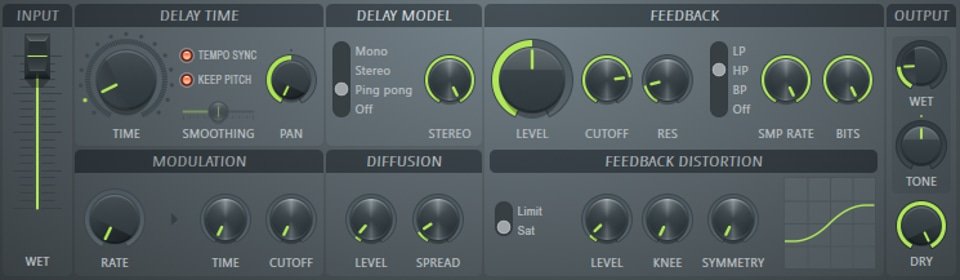
Fruity Delay 3 provides flexibility in creating rhythmic delays, adding dimension to your vocal mix.
Settings:
- Experiment with delay time and feedback for rhythmic effects.
- Utilize filters to shape the delay’s frequency content.
- Blend the wet/dry mix to achieve the desired level of delay.
6. Saturation (Fruity Waveshaper)

Add warmth and color to your vocals using the Fruity Waveshaper for subtle saturation.
Settings:
- Apply gentle waveshaping to add harmonic richness.
- Adjust the mix control for parallel processing.
7. Mastering Limiter (Fruity Limiter)

Place a Fruity Limiter on the master channel to control the overall mix and ensure it translates well across different playback systems.
Settings:
- Set a ceiling to prevent clipping.
- Adjust gain to achieve a competitive loudness level.
Mixing Workflow
- Initial Cleanup: Trim unnecessary silence at the beginning and end of the vocal track. Use the Parametric EQ 2 for basic tonal adjustments.
- Dynamic Control: Apply gentle compression using the Fruity Limiter to even out vocal dynamics.
- De-Essing: Tame sibilance using Fruity De-Esser.
- Spatial Enhancement: Introduce reverb and delay to create a sense of space.
- Tonal Shaping: Fine-tune the vocal tone with additional EQ adjustments.
- Saturation: Add subtle saturation for warmth and character.
- Final Polish: Apply a mastering limiter on the master channel for overall control.
Conclusion
Achieving a professional Hip-Hop vocal mix in FL Studio is an art that combines technical expertise with a creative touch. By leveraging the capabilities of FL Studio’s stock plugins, you can sculpt your vocals into a polished and impactful element of your Hip-Hop production.
Experiment with these FL Studio stock plugins, trust your ears, and tailor the settings to suit the unique characteristics of your vocal recordings. With dedication and practice, you’ll master the art of Hip-Hop vocal mixing in FL Studio.
As I promised you from the beginning, I am providing you with the vocal chain preset file for FL Studio. Download it here, and drag and drop it in the mixer over your vocal channel for immediate results.
Depending on the voice track you work with, the settings can be adjusted until the desired result is obtained. Enjoy!
Also read: How To Do FL Studio Sidechain Compression
If you want us to help you in the mixing and mastering process, we offer professional online mixing and mastering services at very advantageous prices. We use the best software and hardware tools, in addition to many years of experience to provide the most professional sound possible for your music.
Disclaimer: Any references to any brands on this website/webpage, including reference to products, trademarks, brands and companies, are provided for description purposes only. We don't have any association with or endorsement by these brands or companies. Some of the links on our blog may be affiliate links. This means if you click on these links and make a purchase, we may earn a commission at no extra cost to you.
Check Out My New Fabfilter Pro-Q3 Presets Pack!
You may also like to read...
Soundtoys Decapitator – The Secret to Authentic Analog Tone
Antares Auto-Tune vs. Waves Tune Real-Time – Which is better?
How To Mix an 808 Bass In Trap & Hip-Hop Music
Mastering Advanced: Tube EQ, Compression, and Harmonic Excitation
How To Prepare Your Song For AI Music Mastering
My Review Of The Oeksound Soothe 2 Audio Plugin
Book My Mixing & Mastering Services