
Mastering
Soft Clipping and Limiting: Increase Loudness Without Distortion
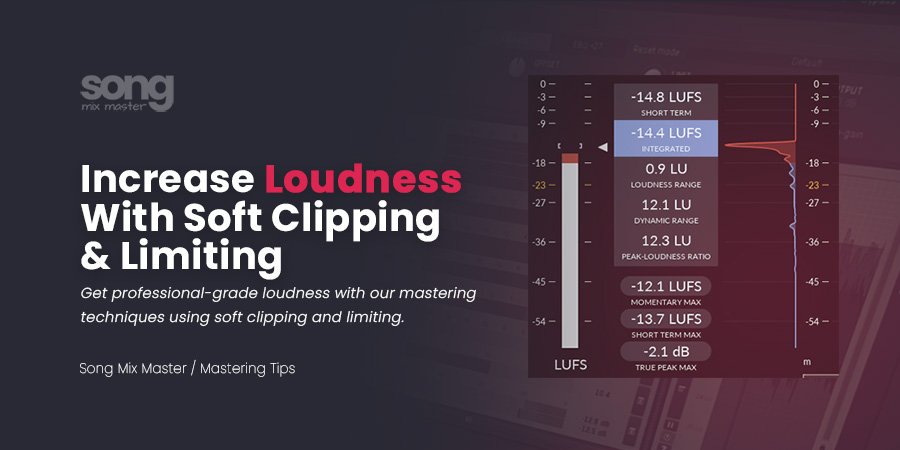
Soft clipping and limiting are two of the most important tools for increasing loudness in mastering. Used correctly, they can help a track sound louder, denser and more competitive without instantly destroying the punch, clarity and low-end impact of the mix.
The goal is not simply to push a limiter harder. A loud master usually comes from controlling short transient peaks before the final limiter, keeping the low end stable, preserving enough crest factor and making small loudness moves across more than one stage.
In this guide, you will learn how to use soft clipping and limiting together, how much clipping is safe, why two limiters can work better than one, and how to avoid distortion when making your master louder.
Also read: Audio Mastering Guide: Loudness, EQ, Limiting, LUFS and Presets
How Do Soft Clipping and Limiting Increase Loudness?
Soft clipping increases loudness by gently rounding off short transient peaks before they hit the limiter. Limiting increases loudness by preventing the signal from exceeding a final ceiling. When used together, soft clipping can reduce the amount of work the final limiter has to do, helping the master sound louder with less pumping, distortion and transient damage.
Think of soft clipping as a way to control the fastest peaks before the limiter. Think of limiting as the final loudness and ceiling control. If the limiter is doing all the work by itself, the master can quickly become flat, distorted, harsh or smaller than the original mix.
Soft Clipping vs Limiting
Soft clipping and limiting both control peaks, but they do it in different ways. Understanding the difference helps you decide when to use each one.
Soft Clipping
Main job:
Rounds off short transient peaks before they hit the limiter.
Best used for:
Drums, transients, loud electronic masters, peak control before limiting and increasing perceived loudness.
Main risk:
Harsh distortion, damaged transients or weak low end if pushed too far.
Limiting
Main job:
Stops the audio from passing a final output ceiling.
Best used for:
Final loudness, true peak control, streaming-safe masters and final output protection.
Main risk:
Pumping, dullness, crushed dynamics and reduced punch if overused.
Best workflow: Use soft clipping to control short, sharp peaks before the limiter. Then use limiting to control the final output ceiling and loudness. The key is to avoid forcing either process to do too much.
What Is Soft Clipping in Mastering?
Soft clipping is a form of peak control that rounds off the top of short transients instead of cutting them sharply. Compared with hard clipping, soft clipping usually sounds smoother because the clipping curve is more gradual.
In mastering, soft clipping is often used before the final limiter to reduce fast peaks from drums, percussion, synth transients or aggressive low-end hits. By shaving a small amount from these peaks, you can often push the overall master louder without making the limiter react too aggressively.
Soft clipping can be useful for genres such as EDM, techno, trap, hip-hop, drill, drum and bass, pop and other modern styles where loudness and transient control are important. However, it is not a magic tool. If you clip too much, the master can become harsh, distorted and fatiguing.
Also read: Soft Clipping in Mixing and Mastering: Best Tips and Techniques
What Does Limiting Do in Mastering?
Limiting is usually one of the final stages in mastering. A limiter prevents the audio from exceeding a chosen ceiling while allowing you to increase the input gain and raise the perceived loudness of the track.
A good limiter can make a master louder while preserving punch, clarity and stereo balance. A limiter pushed too hard can create distortion, pumping, reduced depth, dull transients and a smaller-sounding master.
This is why the limiter should not be treated as the only loudness tool. If the mix is unbalanced, the low end is unstable or the transients are too sharp, the limiter will struggle. Loudness starts before the limiter.
Also read: Mastering Loudness: Best Strategies for Maximum Loudness
Recommended Loud Mastering Chain
A practical loud mastering chain does not rely on one limiter doing all the work. Instead, loudness is built in stages. Each processor should do a small job, so the final result sounds louder without feeling crushed.
- Corrective EQ: remove low-end buildup, harsh resonances and unnecessary rumble before heavy loudness processing.
- Compression or glue compression: gently control movement if the mix needs more cohesion.
- Saturation or soft clipping: control short transient peaks and add density before limiting.
- First limiter: catch peaks transparently and add a moderate loudness increase.
- Final limiter: set the ceiling, control true peaks and reach the final loudness target.
This chain is only a starting point. Some masters need no compression. Some need no clipping. Some mixes already arrive loud and controlled. The best mastering chain is always the one that solves the real problem in the song.
How to Use Soft Clipping Before Limiting
Soft clipping should usually be subtle in mastering. The purpose is to control the shortest peaks, not to destroy the waveform. Start with the clipper before your final limiter and increase the input gain slowly.
Listen carefully to the kick, snare, vocal, bass and high-frequency transients. If the master becomes gritty, harsh, smaller or distorted, you are clipping too much.
Soft Clipping Starting Workflow
- Place the soft clipper before the final limiter.
- Start with no clipping or very light clipping.
- Increase the input gain slowly until the loudest peaks are controlled.
- Compare the clipped and unclipped versions at the same loudness.
- Stop before the kick, snare, vocal or low end starts to sound damaged.
A good soft clipping move is often felt more than heard. If you immediately hear the clipping as distortion, you may have pushed it too far.
How Much Soft Clipping Should You Use?
There is no fixed amount of soft clipping that works for every track. A hard electronic master may tolerate more clipping than an acoustic, cinematic, jazz or vocal-focused track.
As a safe starting point, use soft clipping only to catch the shortest transient peaks. If you are removing too much of the transient shape, the master may become loud but less exciting.
Watch for these warning signs:
- The kick loses punch.
- The snare becomes papery or harsh.
- The vocal becomes edgy or distorted.
- The low end starts to crackle or fold.
- The master feels smaller even though it is louder.
For very loud electronic, trap or aggressive music, some masters may reach very high RMS levels, but this should never be treated as a fixed target. Use loudness, distortion, punch, low-end stability and reference tracks together when deciding how far to push the master.
Why Use Two Limiters Instead of One?
Using two limiters in series can sound cleaner than forcing one limiter to create all the loudness. The first limiter can catch peaks and add a small amount of level, while the second limiter can control the final ceiling and polish the loudness.
As a starting point, let the first limiter do only light to moderate work. Then use the second limiter for the final loudness push. If either limiter starts pumping, distorting or flattening the transients, reduce the input gain and spread the work more evenly.
Two-Limiter Mastering Workflow
- First limiter: use transparent settings and catch the strongest peaks.
- Leave some headroom: do not force the first limiter to reach the final loudness alone.
- Second limiter: set the final ceiling and add the last loudness step.
- Compare constantly: make sure the louder version is actually better, not just louder.
For example, you might use a transparent limiter such as FabFilter Pro-L2 as the first limiter and another limiter as the final ceiling stage. The exact plugin is less important than the concept: do not make one limiter do all the work.
Also read: 10 Essential Tips for Mastering With FabFilter Pro-L2
How Loud Should the Master Be?
There is no single loudness target that works for every genre. A loud techno, trap or EDM master can usually be pushed harder than an acoustic, jazz, cinematic or dynamic pop master. Instead of chasing one number, compare your master to professional reference tracks in the same genre.
Watch these signs while increasing loudness:
- The kick should still punch.
- The low end should not distort or fold.
- The vocal or lead element should not become harsh.
- The limiter should not pump obviously.
- The master should still sound good when turned down.
- The chorus should still feel bigger than the verse if the arrangement is designed that way.
LUFS, RMS, peak level, true peak and crest factor are all useful measurements, but none of them replace listening. A master that measures loud but sounds distorted, flat or tiring is not a better master.
Also read: Understanding RMS and LUFS in Audio Mastering
True Peak Ceiling: How Low Should You Set the Limiter?
The limiter ceiling controls the maximum output level of your master. If the ceiling is too close to 0 dBFS, the audio may create inter-sample peaks after conversion or streaming encoding.
For many streaming-focused masters, a ceiling around -1.0 dBTP is a safer choice. For louder club or electronic masters, some engineers use a higher ceiling, but this increases the risk of distortion after conversion.
If you are preparing a master for streaming, always consider true peak control. If you are preparing a master for club playback, DJ use or a specific label requirement, compare with references and follow the delivery specifications.
Also read: Mastering for Spotify: Achieving the Perfect LUFS Level
Soft Clipping, Crest Factor and Perceived Loudness
Crest factor is the difference between the peak level and the average level of the audio. A track with very high peaks and low average level may sound quieter because the peaks prevent you from raising the overall level.
Soft clipping can reduce some of those short peaks, allowing the average level to come up. This can increase perceived loudness, but it also changes the transient shape. The challenge is to reduce unnecessary peaks without removing the musical impact.
If you reduce the crest factor too much, the master may become loud but lifeless. If you leave the crest factor too high in a genre that demands loudness, the master may feel weak compared with professional references.
Also read: How to Optimize Crest Factor for More Loudness
Common Soft Clipping and Limiting Mistakes
Most loudness problems come from pushing the wrong stage too hard. Soft clipping and limiting can be powerful, but they can also ruin a master quickly when used without a clear reason.
- Clipping too much low end: heavy bass clipping can create ugly distortion and reduce power.
- Using one limiter too hard: this often causes pumping, dullness and a smaller master.
- Ignoring true peak: a master can still clip after conversion if the ceiling is too high.
- Chasing loudness numbers only: loudness without punch, clarity and balance is not a better master.
- Not comparing to references: reference tracks help you know when the master is loud enough for the genre.
- Skipping level matching: louder usually sounds better at first, so compare fairly.
- Using soft clipping on every track by default: some songs need dynamics more than extra loudness.
Best Plugins for Soft Clipping and Limiting
You can use many different plugins for soft clipping and limiting. The best plugin is the one that helps you reach the loudness target while keeping the track musical, clear and punchy.
Soft Clipping Plugins
- TR5 Classic Clipper: useful for simple peak clipping and loud electronic mastering workflows.
- bx_clipper: useful for modern clipping, peak control and loudness shaping.
- StandardCLIP: a popular clipping tool for transparent or creative clipping.
- KClip: useful for clipping drums, buses and masters with different clipping styles.
Limiter Plugins
- FabFilter Pro-L2: transparent limiting, loudness metering and flexible limiter styles.
- Invisible Limiter: useful for loud final limiting workflows.
- Ozone Maximizer: popular for mastering loudness and true peak control.
- Limitless: advanced multiband limiting for detailed mastering control.
Also read: Best Mastering Audio Plugins
Final Loudness Checklist
Before exporting your final master, use this checklist to make sure the loudness processing is helping the song instead of damaging it.
- Does the master sound better when level-matched with the unprocessed version?
- Is the kick still punchy?
- Is the bass clean and stable?
- Is the vocal or lead element still clear?
- Is the limiter pumping?
- Is the soft clipping audible in a bad way?
- Does the master still have movement and contrast?
- Does it compare well with professional reference tracks in the same genre?
- Is the true peak ceiling appropriate for the release format?
- Does the master still sound good at low volume?
Final Thoughts
Soft clipping and limiting can help you increase loudness, but they should be used with intention. The goal is not to destroy every peak or chase the loudest possible number. The goal is to make the song feel powerful, controlled and competitive while preserving the energy that makes the mix exciting.
Use soft clipping to control short transient peaks. Use limiting to control the final ceiling and loudness. Use reference tracks to guide your decisions. Most importantly, listen for punch, clarity, distortion, emotion and balance.
If you want a faster starting point for mastering loudness, check out the FL Studio Mastering Presets Pack. If you want a professional engineer to handle your final master, explore our online mixing and mastering services.
Frequently Asked Questions
Yes, soft clipping is often useful before limiting because it can control short transient peaks before they hit the final limiter. This can help the limiter work less aggressively and may allow a louder master with fewer artifacts.
Use only as much soft clipping as the track can handle without audible distortion, harshness or loss of punch. Start with small amounts and compare against the unclipped version at the same loudness.
Yes. Soft clipping can increase perceived loudness by reducing short peaks that limit how much gain you can add. It works best when combined with good mix balance, controlled low end and careful limiting.
No. Soft clipping rounds off peaks and adds saturation-style distortion when pushed. Limiting prevents the signal from exceeding a set ceiling. Both can control peaks, but they sound and react differently.
Two limiters can split the workload. The first limiter can catch peaks and add a small loudness increase, while the second limiter controls the final ceiling and final loudness. This can sound cleaner than pushing one limiter too hard.
For many streaming masters, a true peak ceiling around -1.0 dBTP is a safer starting point because it reduces the risk of inter-sample clipping after encoding. Louder genre-specific masters may use different ceilings depending on the release goal.
No. Soft clipping is useful when short transient peaks are limiting loudness potential, but not every song needs it. Acoustic, cinematic, jazz or highly dynamic music may sound better with little or no clipping.
Affiliate disclosure: Some links on this page are affiliate links. If you make a purchase through them, we may earn a commission at no extra cost to you. Brand disclaimer: All product names, trademarks, and brands belong to their respective owners. References are for identification and informational purposes only.
Check Out My Custom Mixing Presets!
New Mixing Presets
Waves Vocal Chains
$24.99Original price was: $24.99.$19.99Current price is: $19.99.FabFilter Pro-Q4 Presets
$24.99Original price was: $24.99.$19.99Current price is: $19.99.FL Studio Vocal Mixing Presets
$19.99Original price was: $19.99.$15.99Current price is: $15.99.FL Studio Mastering Presets
$19.99Original price was: $19.99.$15.99Current price is: $15.99.You may also like to read...
The Essential Guide to Audio Normalization
Subtractive EQ Vs. Additive EQ – Advanced EQ Techniques
FL Studio Delay Effect Tutorial + Advanced Tips & Tricks
Waves Curves vs. Soothe2: Which Audio Plugin is Better?
A Comprehensive Guide to Song Remastering – How To Remaster a Song
Review of the Empirical Labs EL8 Distressor Plugin by UAD