Audio Plugins, Mastering
My Favorite IK Multimedia Plugins For Audio Mastering
Mastering is the final and critical step in the music production process, where the goal is to enhance and polish a mix to its highest potential. As an audio engineer, I rely on a combination of precision tools and creative techniques to achieve professional audio mastering.
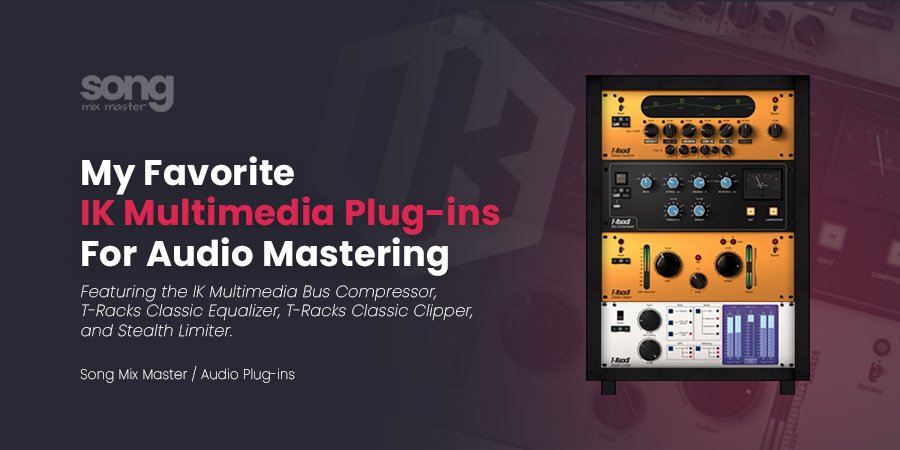
One of my go-to solutions is the IK Multimedia T-Racks suite plugins, which offer exceptional quality and flexibility. In this article, I will walk you through my virtual audio mastering rack (mastering chain), featuring the IK Multimedia Bus Compressor, T-Racks Classic Equalizer, T-Racks Classic Clipper, and Stealth Limiter.
These plugins are indispensable in my workflow, providing the tools needed to control dynamics, shape tonal balance, add warmth, and achieve the final loudness required for competitive mixes.
1. T-Racks Classic Equalizer

First in my mastering chain is the T-Racks Classic Equalizer. This versatile tool allows me to shape the tonal balance of my mix with precision, enhancing clarity and ensuring everything sits well together.
My Settings:
- Low Cut (20 Hz): Remove any subsonic unwanted frequencies.
- Low Shelf (80 Hz): A slight boost of +1 to +2 dB adds warmth and fullness.
- Low Mid (250 Hz): I apply a subtle cut of -1 to -2 dB to reduce muddiness.
- High Mid (2.5 kHz): A gentle boost of +1 to +2 dB brings presence and clarity.
- High Shelf (10 kHz): A boost of +2 to +3 dB adds air and brightness.
Application Tips:
- Tonal Balance: I use the EQ to correct imbalances and enhance the overall tonal quality of the mix.
- Clarity and Definition: Subtle boosts and cuts help me achieve clarity and definition without introducing harshness.
- Avoid Over-EQing: Making small, precise adjustments prevents over-processing and maintains the natural sound.
2. IK Multimedia Bus Compressor

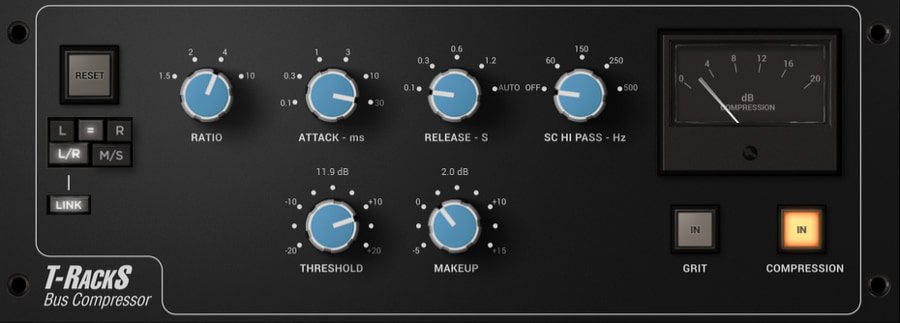
Second, comes the IK Multimedia Bus Compressor, which is an essential tool in my mastering chain. I use it to add cohesion and punch to my mixes without sacrificing dynamics. This plugin emulates the classic SSL bus compressor, which is renowned for its smooth and transparent glue compression.
My Settings:
- Ratio: I prefer a 1.5:1 or 2:1 ratio for light compression, taming the peaks more naturally.
- Attack: I start with a 20ms or 30ms attack time, which allows the transients to pass through and preserves the punch.
- Release: Setting the release to 0.1s to 0.3s helps maintain the energy of the mix.
- Threshold: I usually set this until I get about -3 to -4 dB in gain reduction.
- Make-up Gain: I adjust this to match the input level, compensating for the gain reduction.
* You can start with “The Glue” presets and just play with the threshold until you about -3 to -4 dB in gain reduction
Application Tips:
- Glue the Mix: I use the bus compressor to compress the entire mix, gently adding a cohesive feel.
- Dynamic Control: Light compression helps me control dynamics without making the mix sound over-compressed.
- Punch and Clarity: I tweak the attack and release settings to ensure the mix retains its punch and clarity.
3. T-Racks Classic Clipper

The T-Racks Classic Clipper is a gem for adding controlled audio saturation and increasing perceived loudness. It helps prevent peaks from clipping while maintaining the audio’s integrity. Unlike traditional peak limiting, peak clipping can offer a more transparent way to manage peaks, making it a favorite among my clipper plugins.
My Settings:
- Gain: Increase moderately (around +2 to +4 dB) to manage peaks without noticeable distortion.
- Slope: Set to a gentler value (around -12 to -10) for soft clipping.
- Output: Adjust to -0.1 dB to prevent digital clipping.
Application Tips:
- Dynamic Control: Use as the last stage in your mastering chain for transparent peak management.
- Harmonic Saturation: Set high Gain and lower Output to add warmth and presence.
- Creative Distortion: Experiment with extreme Gain and Slope settings for unique effects.
- Subtle Adjustments: Make small, precise changes and A/B tests with the original mix.
- Monitor Levels: Ensure levels are controlled to maintain mix integrity.
4. Stealth Limiter

Finally, the Stealth Limiter is one of my go-to limiter plugins for achieving maximum loudness while maintaining transparency. Its ultra-smooth limiting with minimal artifacts ensures my mixes sound polished and professional, without compromising the dynamic range or introducing unwanted artifacts.
Best Settings:
- Input: A good starting point is gradually increasing the input until you achieve the desired loudness without causing distortion.
- Out Ceiling: Set the Output Ceiling to -0.1 dB to prevent digital clipping in the final mix.
- Modes: Go with TIGHT or Balanced mode to preserve the natural dynamics of the source material.
- ISPL 16x: This will enable Inter-Sample Peak Limiting to predict and manage peaks that occur between samples.
- Dithering: Enable dithering when reducing bit depth from 24-bit to 16-bit to prevent quantization errors and maintain audio quality.
Application Tips:
- Transparency: Use it to achieve high loudness levels without the discernable effects of traditional compression.
- Dynamic Range: The limiter’s advanced inter-sample peak limiting algorithm preserves the perceived sense of dynamics by maintaining the mix’s natural dynamic range.
- Fine-Tuning: Experiment with the different stealth modes to find the one that best enhances your mix.
General Tips for Mastering
I always use reference tracks to compare my mix and ensure it meets industry standards. Continuously comparing the processed track with the original helps me ensure I’m enhancing, not degrading, the mix.
Mastering is about subtle enhancements, so I make small, precise adjustments to avoid over-processing. Keeping an eye on levels prevents digital clipping and maintains headroom.
Also read: 10 Mistakes to Avoid When Mastering Your Own Mixes
By using these IK Multimedia audio plugins in my audio mastering workflow, I can achieve a professional, polished sound that stands out on any playback system. Whether I’m working on a single track or a full album, these tools help me deliver high-quality results every time.
For those looking to expand their toolkit further, I highly recommend the T-RackS 5 MAX Bundle, available at Plugin Boutique for the best price deal. T-RackS 5 MAX v2 includes a massive collection of 53 plugins, from contemporary classics like the multiband Quad Lim and the ultra-transparent Stealth Limiter to timeless favorites like the White 2A, VC-670, and EQ P73.


Disclaimer: Any references to any brands on this website/webpage, including reference to products, trademarks, brands and companies, are provided for description purposes only. We don't have any association with or endorsement by these brands or companies. Some of the links on our blog may be affiliate links. This means if you click on these links and make a purchase, we may earn a commission at no extra cost to you.
Check Out My New Fabfilter Pro-Q3 Presets Pack!
You may also like to read...
Studio One 7’s Splice Integration is a Game-Changer for Producers
Versatile Brilliance On a Budget: sE’s DCM Series Microphones
How To Use FL Studio Soundgoodizer – How It Really Works
Analog Gear vs. Digital Audio Plugins in Mixing and Mastering
Mastering Advanced: Tube EQ, Compression, and Harmonic Excitation
Essential Home Studio Gear for Beginners on a $500 Budget
Book My Mixing & Mastering Services