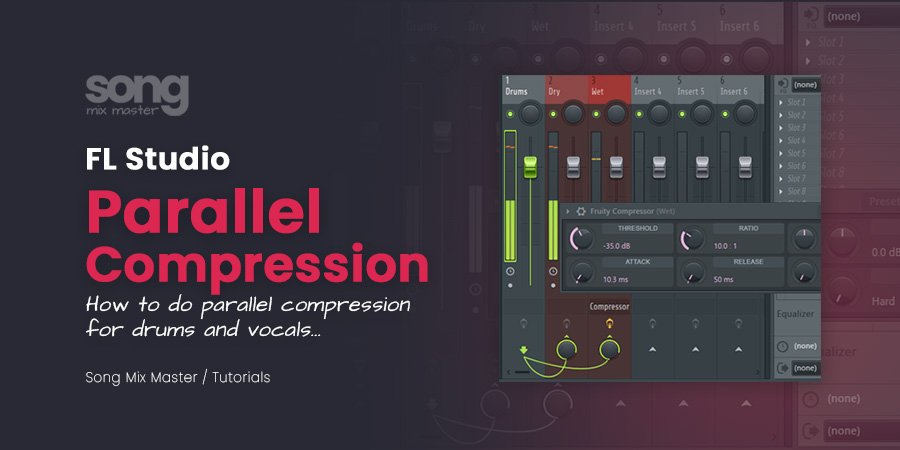
In this article we’re diving into the world of parallel compression and what it can do for your drums. Parallel compression is a powerful compression technique that involves blending a dry signal with a heavily compressed signal to create a sound that’s both dynamic and punchy.
This technique can add depth and sustain to your drums, making them sound bigger and more impactful. I’m going to show you how to do parallel compression in FL Studio and why it’s a game-changer for your mix.
Let’s get started!
How To Use Parallel Compression on Drums in FL Studio
Step 1: Setting Up Your Mixer Tracks

- Open your project in FL Studio and find the drum track you want to enhance.
- Route the drum track to a mixer channel to act as your “dry” signal.
- Create two additional mixer tracks for the parallel compression setup.
- Send the drum track to both of these new mixer tracks by selecting the drum mixer track and right-clicking the arrow at the bottom of each new track. Make sure the original track is no longer routed to the master to avoid doubling the volume.
- Adjust the volume on the routed tracks to balance the overall level. Label one track as “Dry” and the other as “Wet.”
For more detailed instructions on mixer routing, check out FL Studio Mixer Routing with Buses and Send Channels.
Step 2: Applying Compression

- Select the “Wet” track and insert a compressor of your choice. FL Studio’s Fruity Limiter in compressor mode works great, but any reliable compressor will do.
- Set a high ratio (like 4:1 or higher) and a low threshold to heavily compress the signal, effectively squashing the drum hits.
- Adjust the attack to 15-25ms to let the initial hit through before compression kicks in.
- Set the release to about 50ms to keep the compression responsive and natural.
Step 3: Blending the Signals
- Play your track and lower the fader on the “Wet” track.
- Gradually bring up the fader until you get the desired mix of punch and depth in your drum sound. The goal is to combine the natural dynamics of the unprocessed drums with the fullness of the compressed signal.
Another way to route the drum track or the drum bus channel to the parallel compression channel is by using the Fruity Send plugin.
Step 1: Setting Up Your Mixer Tracks

- Identify and select the drum track or the drum bus where all your drum tracks are routed. In my example, I have only a full drum loop linked to my first mixer track, named “Drums”.
- Create a new channel for parallel compression by selecting an empty channel (e.g., channel 2).
- Rename it to “Parallel Comp” by middle-clicking the channel name and typing the new name.
Step 2: Route the Drum Bus to the Parallel Channel
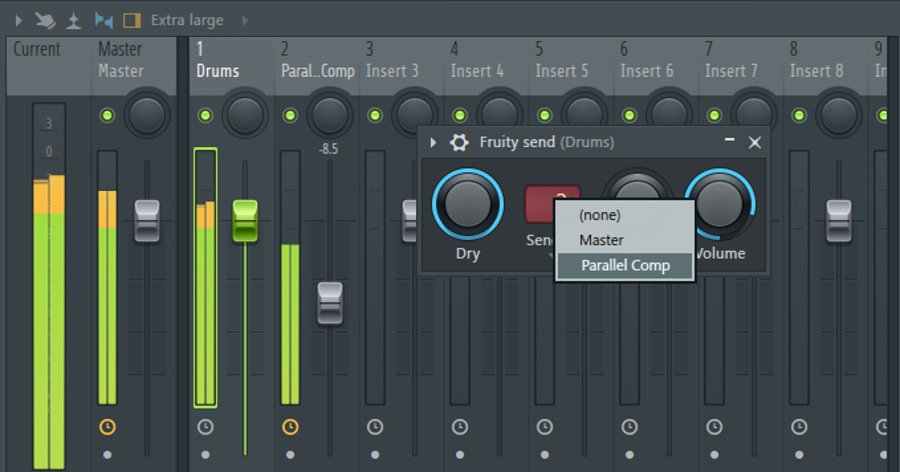
- Select the “Drums” channel, and at the bottom of the mixer, instead of selecting “Route to this track,” choose “Sidechain to this track” to the parallel channel. This allows us to solo the parallel compressed track separately.
- Go to your drum bus, and in the last slot of the effects chain, add the “Fruity Send” plugin, and choose the “Parallel Comp” channel as the destination.
Step 3: Applying Compression

- Select the “Parallel Drum Comp” channel and add a compressor to the first slot. I added the Fruity Limiter plugin and started with the “For Drums” preset.
- Mute the original drum bus to focus on tweaking the compressed channel until you get a fat, punchy sound.
Step 4: Blending the Signals
- Play the track and slowly blend in the “Parallel Drum Comp” channel by lowering or raising the volume fader in the parallel compression track.
- Listen to the difference it makes as you blend the compressed signal with the original drums. You should notice the high hats and claps becoming more prominent and the kick drum gaining a punchy.
Advanced Tips
- Add Additional Effects: You can go beyond compression by adding other effects to the parallel channel, such as a virtual tape machine for added warmth and saturation.
- Experiment: Don’t be afraid to try different effects and settings. Parallel processing is all about experimentation and finding the right blend for your mix.
Why Use Parallel Compression on Drums?
Parallel compression is fantastic for enhancing the volume and sustain of your drums without losing their natural dynamics. This technique is perfect for making your drums sound punchier and more powerful, which is essential for genres like Trap and R&B.
How To Do Parallel Compression on Vocals
Well, you follow the same steps as with the drums. But here are some tips that will be useful to you:
- Select a vocal compressor that adds a touch of character and warmth. Vintage emulations like the LA-2A or 1176 can be great choices. Check out my list of free vst compressors for vocal parallel compression.
- A slightly slower attack (20-30ms) can help preserve the natural transients of the vocal, while a medium release (50-100ms) ensures a smooth, musical compression.
- Start with the wet signal fader down and slowly bring it up until you achieve a balanced blend. The goal is to enhance the vocal without making it sound over-compressed.
- Consider adding an EQ to the compressed track to shape the tone. Cutting some low frequencies can help keep the vocal clear while boosting the highs can add presence and air.
Conclusion
Parallel compression is an invaluable technique to have in your mixing arsenal. While my mixing skills have improved over time, I still turn to parallel compression to give my drums that extra punch and presence.
I hope this tutorial provides you with a solid foundation to explore parallel compression and make your drums stand out in your mixes.
I highly recommend checking out my FL Studio Drum Mixing Presets and FL Studio Mastering Presets Pack to streamline your workflow and help you achieve high-quality mixes and masters quickly and efficiently.
Disclaimer: Any references to any brands on this website/webpage, including reference to products, trademarks, brands and companies, are provided for description purposes only. We don't have any association with or endorsement by these brands or companies. Some of the links on our blog may be affiliate links. This means if you click on these links and make a purchase, we may earn a commission at no extra cost to you.
Need Professional Mixing & Mastering?
You may also like to read...
Mastering Dynamics: How To Use The Waves MV2 Plugin
10 Warm Up Singing Exercises to Improve Your Vocal Performance
Best Affordable Studio Speakers (Monitors) For Home Studios
Mastering Loudness: Best Strategies for Maximum Loudness
What Is Parallel Compression & How To Use It
Increase Mastering Loudness With Soft Clipping and Limiting