Audio Plugins, Mixing
Vocal Compression: Best Plugins and Settings for Pro Mixes

A few elements are as crucial as a standout lead vocal when mixing. A well-compressed vocal can elevate a track, giving it the polish and presence it needs to stand out in a mix. However, achieving the perfect vocal compression is both an art and a science that takes years of practice to master.
In this blog post, I’ll explain the essentials of vocal compression, how it works, and some of the best settings for your compressor plugin. I will also highlight some of my favorite and best vocal compression plugins and techniques to help you achieve that professional vocal sound.
Understanding Vocal Compression

Compression is the process of reducing the dynamic range of an audio signal, making the quieter parts louder and the louder parts quieter. This evens out the vocal performance, ensuring consistency throughout the track. But compression isn’t just about control, it’s also about enhancing the tonal quality and presence of the vocal.
However, like any powerful tool, compression must be used judiciously. Too much compression can make a vocal sound flat and lifeless, while too little can leave it inconsistent and hard to mix.
Key Compressor Controls


Before diving into specific settings, it’s essential to understand the basic controls of a compressor:
- Threshold: The level at which the compressor begins to act. Set this to the point where the vocal gets too loud or peaks.
- Ratio: Determines how much compression is applied. Higher ratios mean more aggressive compression.
- Attack: Controls how quickly the compressor reacts to the signal once it crosses the threshold. A slower attack allows the vocal to maintain its natural punch, while a faster attack can tame harsh transients.
- Release: Dictates how quickly the compressor lets go after the signal drops below the threshold. A faster release can give the vocal more energy, while a slower release can smooth out the sound.
- Knee: Affects how gradually or sharply the compression kicks in. A soft knee provides a more natural-sounding compression, while a hard knee is more aggressive.
- Makeup Gain: Compensates for the gain reduction, bringing the overall level of the compressed signal back up.
Best Practices for Vocal Compression

- Set the Ratio: I always start with setting the ratio (how much compression I need). 3:1 or 4:1 is a good starting point for most vocal tracks. This will apply enough compression to control the dynamics without squashing the vocal’s life.
- Start with a Medium Attack: Begin with an attack time of around 0 up to 10ms and adjust based on the vocal performance. A slower attack will preserve the natural dynamics, while a faster attack will control sharp transients.
- Set the Threshold: Move the threshold until you get around 4-6dB of gain reduction. This should give you a controlled vocal without sounding over-compressed.
- Set the Release Time: Start with a release time of about 40ms. Faster releases add energy, while slower releases can smooth out the vocal.
- Use Multiple Compressors: Consider using serial compression, which involves stacking two or more compressors with different settings. For example, one compressor with a slow attack can control peaks, while another with a faster attack can smooth the overall performance.
You can also read my predictive audio compression technique to learn why and how to choose the best compressor settings.
Vocal Compression by Genre
Different genres call for different approaches to compression:
- Pop & R&B: These genres favor a polished, upfront vocal sound. Use a medium attack and release with a higher ratio to ensure the vocal stays consistently in the mix.
- Rock: Rock vocals often require more aggressive compression, with a faster attack to control peaks and a higher ratio to keep the vocal tight.
- Jazz: Use light compression to preserve the natural dynamics of the vocal. Set a slower attack and release and keep the ratio low to maintain the live feel of the performance.
- EDM: EDM often features heavily processed vocals. Use sidechain compression to create space for the kick and other rhythmic elements, and don’t be afraid to push the ratio higher for a more compressed sound.
Best Vocal Compression Plugins
Although I prefer to use the stock compressors from my DAWs (be it Studio One or Cubase), there are some third-party vocal compression plugins that I sometimes use and may also deserve your attention. Some emulate the sound and behavior of analog hardware, which adds harmonies and subtle saturation to the voice to get even more remarkable results.
UAD 1176 Classic Limiter Collection

UAD 1176 plugin includes emulations of the iconic 1176 hardware compressors, known for their fast attack times and punchy FET compression. These are ideal for adding presence and energy to vocals, with the ability to fine-tune compression to suit your needs.
UAD LA-2A

LA-2A is a legendary compressor known for its smooth, musical compression. It uses optical technology to achieve a warm, natural sound, making it ideal for vocals. In many cases, I use the LA-2A compressor when I do vocal serial compression after first putting an 1176 in front. Also, check some of the best free LA-2A compressor plugin emulations.
FabFilter Pro-C 2

FabFilter Pro-C 2 is a highly versatile compressor with many features, including different compression styles like Vocal, Clean, and Classic. The Vocal mode is explicitly tailored for vocal tracks, providing transparent and smooth compression. Its detailed visual interface allows precise control over attack, release, and ratio settings, making it easy to fine-tune your vocal compression.
Renaissance Vox (R-Vox)
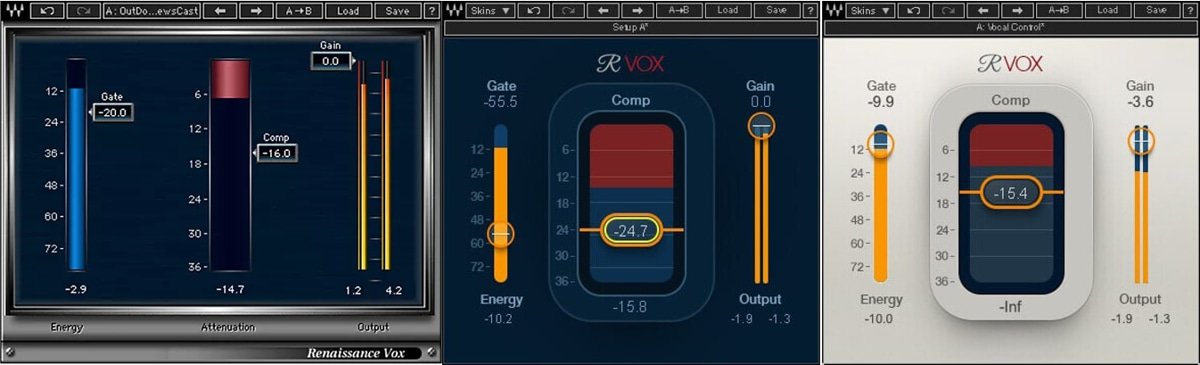
Renaissance Vox (R-Vox) is my go-to for quick, easy vocal compression. R-Vox by Waves simplifies the process with just a few controls, making it perfect for taming vocals without overthinking the settings. Often, it is exactly what is needed without complicating things.
Tube-Tech CL 1B

Tube-Tech CL 1B from Softube is a favorite among many professional engineers for its warm, tube-based compression. It’s particularly effective on vocals, providing smooth, musical compression that enhances the natural character of the voice.
Final Thoughts
Vocal compression is a vital part of mixing that requires a delicate balance between control and creativity. The key is understanding the tools at your disposal, experimenting with different settings, and trusting your ears. Take the time to refine your technique, and your vocal mixes will start to shine with professional polish.
Disclaimer: Any references to any brands on this website/webpage, including reference to products, trademarks, brands and companies, are provided for description purposes only. We don't have any association with or endorsement by these brands or companies. Some of the links on our blog may be affiliate links. This means if you click on these links and make a purchase, we may earn a commission at no extra cost to you.
Need Professional Mixing & Mastering?
You may also like to read...
5 Best Budget Audio Interfaces For Home Recording Studios
How To Do FL Studio Sidechain Compression Like a PRO
Mastering Your Tracks at -14 LUFS: Good or Bad?
Best Affordable Studio Speakers (Monitors) For Home Studios
Mastering Natural Vocals: Essential Tips for Musicians
Mixing Vs. Mastering – Explaining The Main Differences