
Mastering, Music Industry
Why Is My Suno Song So Quiet? Loudness and LUFS Explained
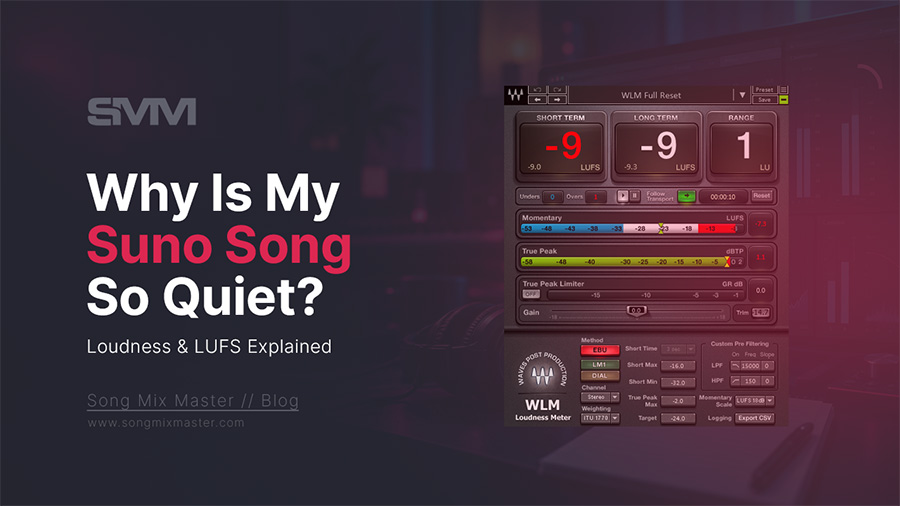
A track can hit close to 0 dBFS and still sound noticeably quieter than a commercial release. That surprises many producers because peak level looks high, yet the song still lacks the density and impact they expect.
The reason is simple: peak level and perceived loudness are not the same thing. In audio mastering, loudness depends on much more than how close the waveform gets to the digital ceiling. LUFS, crest factor, transient behavior, frequency balance, compression, clipping, and limiting all influence how loud a song feels.
This matters with Suno because some generated tracks already contain strong peaks or dense processing, which means simply adding gain can create clipping without giving you the loudness increase you expected.
In this guide, I’ll explain why a Suno song can sound quiet, how LUFS and true peak relate to perceived loudness, and how I would approach increasing level without destroying punch, clarity, or dynamics.
Quiet Does Not Always Mean Low Volume
Before changing anything, decide what you actually mean by “quiet.”
There are several possibilities.
- The track is genuinely lower in integrated loudness.
- The peaks are high, but the average level is low.
- The bass consumes too much headroom.
- The transients are unusually strong compared with the body of the mix.
- The track lacks midrange density.
- The reference song is heavily limited.
- You are comparing two files at different playback levels.
A loudness meter can help you identify some of these differences, but your ears still need to tell you what is causing the problem.
This is why I do not begin by turning a limiter up until a particular LUFS number appears.
Peak Level and Loudness Are Not the Same Thing
This is the most important concept to understand.
A digital peak meter tells you how close the highest sample or reconstructed peak gets to the system’s maximum level.
It does not tell you how loud the song feels over several seconds or across the entire track.
Imagine two songs that both peak close to -1 dBTP.
One may measure -17 LUFS integrated because it has large transient peaks and substantial dynamic contrast.
The other may measure -9 LUFS because compression, clipping, and limiting have raised the average energy much closer to the peaks.
Both can have similar maximum peak values while sounding dramatically different in loudness.
If you want a deeper explanation of digital levels, my guide to decibels and 0 dBFS explains why the top of the digital scale does not represent perceived loudness.

What Is LUFS?
LUFS stands for Loudness Units relative to Full Scale. Unlike a simple peak meter, LUFS uses frequency weighting and time-based measurement to estimate perceived loudness more closely.
For mastering, you will commonly see three LUFS measurements.
- Integrated LUFS: the average perceived loudness across the measured program. This is the value most commonly discussed when people compare mastering loudness or streaming normalization.
- Short-Term LUFS: measures a shorter moving window and helps you see how the loudness changes between verses, choruses, drops, and other sections.
- Momentary LUFS: reacts even more quickly and gives you a closer look at short loudness changes.
I explain these measurements in more depth in my guide to what LUFS are and why they matter in mastering.
Why Can a Suno Track Peak High but Still Sound Quiet?
This often comes down to the relationship between peaks and average level.
A kick, snare, vocal consonant, bass transient, or another short event can reach a high peak without contributing much to the average loudness of the full song.
If a handful of peaks are already approaching the digital ceiling, you cannot simply add another 6 dB of gain without clipping them.
That means you need to manage the peaks before you can safely raise the average level.
This is one of the main jobs of mastering.
Crest Factor Explains a Lot About Perceived Loudness
Crest factor describes the relationship between the peak level and the average level of a signal.
A track with a large crest factor has more distance between its peaks and its average energy. A track with a smaller crest factor has a denser relationship between the two. Neither is automatically better.
A large crest factor can preserve punch, openness, and dynamics. A smaller crest factor can create more density and perceived loudness. The mastering challenge is finding a balance appropriate for the music.
If you are interested in this relationship, I have a dedicated guide on optimizing crest factor for more loudness.
Why Simply Turning Up the Gain Does Not Work
Suppose your Suno track peaks at -0.5 dBFS but still sounds quiet. If you add 4 dB of gain, those peaks will try to move above 0 dBFS.
Without some form of peak control, the waveform clips. Clipping can introduce harsh distortion, particularly on complex material such as vocals, cymbals, and dense choruses.
Turning the gain up only works cleanly when enough unused peak headroom remains.
Once the peaks are close to the ceiling, increasing average loudness requires managing those peaks rather than merely moving the entire waveform upward.
Compression Can Increase Density, but It Is Not a Volume Knob
Compression reduces the level difference between louder and quieter parts according to the settings you choose.
After controlling peaks or dynamic variations, you can use makeup gain to raise the overall level.
This can increase perceived density.
However, adding compression simply because the song feels quiet can make the track worse.
If the Suno generation already sounds compressed, another compressor may flatten drum transients, pull ambience forward, emphasize artifacts, and make the chorus feel smaller.
I only use compression when the dynamics themselves need control.
For a broader technical explanation, see my guide to audio compression and its different types.
The Limiter Is Usually the Final Loudness Stage
A limiter allows you to raise average level while preventing peaks from exceeding a defined ceiling.
This is why limiting plays such an important role in modern mastering.
But a limiter is not free loudness.
As you push more level into it, the limiter has to reduce more peak energy.
At first, this may sound excellent.
The song becomes louder and more cohesive, while the loudest transient peaks are controlled.
Push farther, and you may begin to hear:
- softened kick attacks,
- smaller snares,
- bass distortion,
- harsh vocals,
- more obvious cymbal artifacts,
- pumping,
- reduced stereo depth,
- and listener fatigue.
The best limiter setting is therefore not the setting that produces the largest LUFS number.
It is the setting where the song reaches the loudness you need without losing the musical qualities you want to preserve.
How Loud Should a Suno Song Be?
There is no single correct answer. A sparse acoustic track and a dense electronic track should not automatically have the same integrated loudness.
A ballad may benefit from large dynamic contrasts. A modern pop or hip-hop record may need greater density to achieve the intended impact.
I consider several factors before deciding how far to push a master:
- genre,
- arrangement density,
- transient structure,
- existing compression,
- low-frequency energy,
- distortion tolerance,
- and the artistic direction of the track.
I discuss this philosophy in my guide to mastering loudness and maximizing level without sacrificing quality.
Does Spotify Want Every Song at -14 LUFS?
Spotify currently uses -14 LUFS as its Normal playback normalization level.
It also offers -19 LUFS for Quiet playback and -11 LUFS for the Loud setting available to Premium listeners. :contentReference[oaicite:1]{index=1}
However, that does not mean Spotify rejects a master at -10 LUFS or -8 LUFS.
If a master is louder than the selected playback reference, Spotify applies negative gain during playback.
The uploaded audio is not rewritten simply because it exceeds -14 LUFS. Spotify measures the track and adjusts playback gain when normalization is active. :contentReference[oaicite:2]{index=2}
This is why I do not automatically master every Suno track to exactly -14 LUFS.
I explain this distinction in much greater detail in my Suno mastering guide for Spotify, Apple Music, and streaming.
Why Can a -9 LUFS Master Still Be Better Than a -14 LUFS Master?
Because LUFS does not tell you whether the mastering sounds good. If a dense electronic song reaches -9 LUFS cleanly, with strong transients and controlled low end, lowering it to -14 LUFS during mastering does not automatically improve it.
Spotify may simply turn the louder version down during normalized playback. The important question is what remains after the volume difference disappears.
Does the -9 LUFS master retain better density and impact? Or did the limiting remove punch and create distortion? You need to compare the two at similar playback levels before deciding.
Why Can a -14 LUFS Master Still Sound Quiet?
This is another common source of confusion. Two songs can both measure -14 LUFS and still feel different. Frequency balance influences perceived impact.
A mix with huge sub-bass energy may consume significant signal energy without sounding subjectively powerful on small speakers.
A track with strong midrange energy can feel more forward even when the integrated measurement is similar.
Transient shape, stereo image, arrangement density, and tonal balance also influence the perception of loudness. LUFS is extremely useful.
It is not a complete description of how a record sounds.
Low End Can Make a Suno Track Harder to Master Loud
Low frequencies contain a lot of energy. If a Suno generation has excessive sub or bass energy, the limiter may react strongly to information that is not providing useful perceived loudness.
The result can be frustrating. You push the limiter harder, but the track does not seem proportionally louder. Instead, the kick becomes smaller, the bass distorts, or the whole mix begins pumping.
Before pushing loudness, I check whether the low end is balanced efficiently. This does not mean automatically cutting everything below a certain frequency.
The solution might be a subtle EQ move, dynamic control, better mono stability, or no correction at all. My guide to EQing bass and low end explains why different low-frequency problems require different tools.
Harshness Also Limits How Loud You Can Push the Track
A harsh song usually becomes more tiring as you raise average loudness. This is especially relevant when the source already contains aggressive vocals, cymbals, upper mids, or synthetic high-frequency textures.
You may technically be able to push the limiter another 2 dB. Your ears may tell you that you should not. Before maximizing loudness, control genuine resonances and harshness where necessary.
Dynamic EQ and resonance suppression can be useful because they reduce problematic energy only when it becomes excessive rather than permanently dulling the full mix.
Clipping Can Make a Track Louder, but It Has Consequences
Soft clipping and controlled clipping are common tools in modern loud mastering.
By shaving very short transient peaks before the limiter, a clipper can reduce the amount of work the final limiter needs to perform.
That can sometimes increase loudness while retaining more punch.
But clipping also adds distortion. Used carefully, that distortion may be subtle or even musically useful. Used aggressively, it can make vocals brittle, drums abrasive, and high frequencies unpleasant.
The source matters greatly. AI-generated audio that already contains rough transient textures may not tolerate the same clipping settings as a clean drum mix.
If you want to explore this approach, read my guide to increasing loudness with soft clipping and limiting.
Do Not Confuse Existing Clipping With Mastering Clipping
If the original Suno export is already audibly clipped, adding another clipper does not repair the damage.
You first need to decide whether the source is worth processing, whether restoration is possible, or whether a cleaner generation is available.
Reducing the level of an already clipped file only makes the distortion quieter.
It does not reconstruct the missing peak shape.
My guide to audio clipping, its causes, and possible solutions explains the difference in more detail.
True Peak Matters When You Make the Song Louder
Sample peaks are not the entire story. During digital-to-analog reconstruction or lossy encoding, the reconstructed waveform can create peaks higher than the individual digital samples suggest.
These are often discussed as inter-sample or true peaks. That becomes especially important when you push a track hard into a limiter.
Spotify currently recommends a true-peak maximum below -1 dBTP for masters optimized around -14 LUFS. For masters louder than -14 LUFS, Spotify recommends keeping true peak below -2 dBTP because louder material can be more susceptible to distortion during encoding. :contentReference[oaicite:3]{index=3}
I therefore monitor true peak alongside LUFS rather than watching only one meter.
Why Your Reference Track May Be Misleading You
You load a commercial master next to your Suno track. The commercial release immediately sounds larger. Before changing anything, match the playback loudness.
If the reference is 5 dB louder, your brain will often interpret that additional level as:
- better bass,
- more detail,
- greater width,
- more punch,
- and better clarity.
After you reduce the louder track to approximately the same perceived level, the comparison becomes much more useful.
Now you can compare tone, dynamics, vocal position, low-end weight, stereo image, and fatigue instead of mostly comparing volume.
I explain this process in my guide to using reference tracks in mixing and mastering.
Normalization Can Also Change the Comparison
If you compare your local Suno WAV against a song playing through Spotify, you may not be comparing the files under equivalent conditions.
Spotify may have loudness normalization enabled. Your local player may not.
Your operating system or playback application may also have its own settings.
For a proper mastering comparison, import both tracks into the same environment when possible and level-match them manually.
This removes one major variable.
Why a Dynamic Song Can Feel Quiet at First
Dynamics create contrast. A quiet verse can make the chorus feel larger.
A transient snare can feel more powerful when it rises clearly above the surrounding average level.
If you compare a dynamic master against a heavily limited track for ten seconds, the heavily limited one may initially sound more impressive because its energy remains closer to maximum level almost constantly.
Listen longer. The dynamic version may feel deeper, punchier, and less fatiguing once your ears adjust.
This does not mean dynamic is always better. It means that loudness should serve the music rather than replace contrast.
Can Suno’s Own Remaster Feature Fix a Quiet Track?
Suno currently offers a Remaster feature that creates a new variation while attempting to preserve the structure, lyrics, and performance of the source. Suno describes it as a way to refine overall sound quality, mix balance, sonic texture, and vocal clarity. :contentReference[oaicite:4]{index=4}
That can be useful when the generated source itself needs improvement. However, I would not treat Suno’s Remaster feature as identical to conventional final mastering.
It creates another generated version of the song rather than simply taking your existing stereo file and making transparent final mastering adjustments.
If you like your exact current performance and only want final tonal balance, dynamics, peak control, and loudness, traditional mastering remains a different workflow.
Sometimes the Song Needs Mixing Before More Loudness
Imagine that the vocal is buried and the bass dominates the mix. You can push that stereo file into a limiter until it measures -8 LUFS.
The vocal will still be buried. The bass may now trigger the limiter harder, reducing the apparent impact of everything else.
The track becomes louder without becoming better. This is where stems can help.
Suno Studio itself describes mixing as the process of balancing individual tracks, including making vocals louder or softer with faders. :contentReference[oaicite:5]{index=5}
If the problem belongs to one element rather than the complete mix, solve the mix first.
A Practical Way to Make a Quiet Suno Song Louder
If the stereo mix is already good, I would approach the problem in this order.
1. Measure the Source
Check integrated LUFS, short-term loudness, true peak, and peak behavior.
Do not decide what is wrong from the waveform alone.
2. Listen for Tonal Problems
Excessive sub-bass, low-mid congestion, or harsh upper frequencies can limit how far you can push the master cleanly.
3. Check Existing Dynamics
Determine whether the track needs compression or whether it is already dense enough.
4. Control Unnecessary Peaks
Short transient peaks may be preventing you from raising the average level.
Compression, clipping, transient control, or limiting can help depending on the source.
5. Raise the Final Level With a Limiter
Push gradually and listen to what changes.
Do not focus only on the LUFS meter.
6. Monitor True Peak
Leave a sensible margin for streaming encoding and playback.
7. Compare at Matched Loudness
Compare your original, your master, and appropriate commercial references at similar perceived levels.
8. Check Translation
Listen on headphones, speakers, a phone, earbuds, and a car system if possible.
A Simple Loudness Chain
A possible mastering chain might look like this:
- Corrective EQ or dynamic EQ if required
- Resonance control if required
- Gentle compression if the dynamics need it
- Optional saturation or soft clipping
- Final true-peak limiting
- LUFS and true-peak measurement
I deliberately use the phrase “if required.”
You do not need every processor on every song.
A clean Suno generation may need almost nothing before the limiter.
Another may require tonal repair before it can tolerate any significant loudness increase.
How Much Limiter Gain Reduction Is Too Much?
There is no universal number. One limiter may handle 4 dB of gain reduction transparently on one song and sound obvious at 2 dB on another.
The arrangement, frequency balance, transient structure, limiter algorithm, attack behavior, release behavior, oversampling, and input level all matter.
I stop when the sonic cost becomes greater than the loudness benefit.
Listen especially to the loudest chorus or drop because that is where limiter damage usually becomes easiest to hear.
Should You Use Multiple Loudness Stages?
Sometimes. Instead of forcing one limiter to perform all the work, you can distribute peak control across several stages.
For example, subtle compression might reduce dynamic movement, a clipper might shave very short peaks, and the final limiter might handle the remaining level.
This can sound cleaner than asking one processor to remove a large amount of peak energy.
It can also sound worse if every stage is unnecessary. More processors do not automatically create a more professional master.
Why Midrange Balance Matters for Perceived Loudness
Human hearing is not equally sensitive to every frequency. A track dominated by very low frequencies may measure strongly while still feeling less forward than a balanced track with useful midrange presence.
This is why loudness is partly a mixing and tonal-balance problem. You should not simply boost the mids to trick a LUFS meter, but you should understand that inefficient frequency balance can make a song harder to master competitively.
Stereo Width Can Affect Loudness Perception Too
A very wide track can sound impressive in headphones, but the center may feel weak.
If important energy is spread into phase-sensitive side information, the mix may lose impact on mono or narrow playback systems.
That can make the track seem less powerful even if the LUFS value is technically high.
Check the stereo image and mono compatibility before assuming the solution is more limiting.
Should You Normalize the Suno File Before Mastering?
Usually, there is no need. If the file has sufficient headroom and is not clipping, I can set the gain appropriately inside the mastering session.
Normalization before mastering does not improve audio quality. It simply changes the gain so that the file reaches a selected peak or loudness value.
I explain the process in more detail in my guide to audio normalization.
What If the Suno Song Is Already Very Loud?
Then do not make it louder simply because mastering is the next stage. Some generated tracks may already have dense dynamics and limited peak headroom.
In that situation, mastering may involve reducing harshness, improving tonal balance, controlling true peak, and preserving what already works rather than chasing additional integrated loudness.
A master can be successful without increasing LUFS significantly.
What If My Suno Song Measures Quiet but Sounds Good?
That is also possible. If the song has strong musical dynamics, good balance, and enough subjective impact, a lower integrated loudness may be entirely appropriate.
Do not ruin a good master because an online article told you that every modern track must reach a specific number.
Compare against suitable music at matched level and judge what the arrangement actually needs.
How Spotify Treats a Quiet Track
Spotify can apply positive gain to quieter masters when normalization is enabled, but it takes available headroom into account.
Spotify gives an example of a track measuring -20 LUFS with a maximum true peak of -5 dBFS. Instead of lifting that track all the way to -14 LUFS, it would only raise it to approximately -16 LUFS so that it preserves headroom for playback encoding. :contentReference[oaicite:6]{index=6}
This is another reason to understand both loudness and peaks. A very quiet master with insufficient peak headroom cannot simply be turned up indefinitely by the platform.
Why Some Commercial Tracks Still Seem Louder on Spotify
Even with normalization enabled, two songs can still feel different in loudness.
Spotify itself notes several reasons for this, including dynamic structure, spectral balance, true-peak behavior, playback systems, and whether track-level or album-level normalization is being applied. :contentReference[oaicite:7]{index=7}
This matches what mastering engineers hear in practice. Normalization can equalize overall playback level.
It cannot make every production have the same punch, density, frequency balance, or perceived size.
Should You Master Louder Than -14 LUFS?
You can. The more important question is whether the song benefits from it.
If a track reaches -10 LUFS with clean low end, strong transients, smooth vocals, and no audible limiter stress, I would not automatically reduce it to -14 LUFS just to satisfy a number.
If pushing it from -12 LUFS to -9 LUFS makes the kick disappear and the vocal become harsh, I would stop earlier.
The target should follow the music. For a deeper discussion, read Mastering at -14 LUFS: Good or Bad?
Should You Make Different Loudness Masters for Every Platform?
Usually, no. Spotify currently says you only need to deliver one high-quality stereo master per track, and it handles its own format optimization internally. :contentReference[oaicite:8]{index=8}
I prefer one strong master that works musically rather than separate versions chasing different unofficial LUFS targets for every platform.
Specialized releases such as vinyl, broadcast, club playback, or other dedicated formats can justify alternate mastering decisions.
That is different from creating several nearly identical streaming masters for no clear musical reason.
How to Tell if Your Suno Master Is Loud Enough
I would check five things.
- Does it feel competitive beside appropriate references at matched playback level?
- Does the chorus still have impact?
- Does the vocal remain smooth rather than becoming aggressive?
- Does the low end stay controlled when the limiter works harder?
- Does the track translate across multiple playback systems?
If those answers are positive, the exact integrated LUFS number becomes secondary.
Can Automatic Mastering Fix a Quiet Suno Track?
Yes, if the underlying mix is already balanced. An automated mastering system can measure loudness, control peaks, apply compression or EQ, and raise the final level very quickly.
The limitation appears when the reason the song feels quiet is not simply insufficient mastering level.
If the bass consumes too much headroom, the vocal is buried, or the top end becomes harsh whenever the limiter works harder, the track needs more judgment than a simple “make louder” instruction.
I discuss that distinction in AI mastering vs human mastering for Suno.
When Stems Can Help With Loudness
Sometimes the stereo master cannot become louder cleanly because one element dominates the limiter.
A bass stem may be several decibels too loud. A snare transient may be excessively sharp. A vocal phrase may produce huge peaks.
With stems, you can solve those problems before the signal reaches the mastering limiter.
That can make the final mix louder without forcing the stereo processor to fight one problematic element.
If you want to understand when this approach makes sense, read my guide to Suno stems vs stereo mastering.
A Suno Loudness Checklist
Before calling a Suno track “too quiet,” I would check the following:
- Is the comparison level matched?
- What is the integrated LUFS?
- What is the true peak?
- Is excessive bass consuming headroom?
- Are short peaks limiting how much gain you can add?
- Is the source already compressed?
- Does harshness become worse when you increase loudness?
- Is the stereo image weakening the center?
- Does the track actually need more loudness, or only better balance?
That diagnosis usually tells you much more than the waveform alone.
Want Me to Make Your Suno Track Release-Ready?
If your Suno song feels quieter or less controlled than the releases you are comparing it with, I offer professional Suno mastering by a real mastering engineer.
I do not simply push every track toward one LUFS number.
I listen to the source, check tonal balance, dynamics, low-end behavior, peaks, harshness, stereo translation, and the amount of limiting the track can tolerate before the sound begins to deteriorate.
You can also request a free mastering demo using your own Suno song before deciding whether you want the complete master.
Final Thoughts
If your Suno song sounds quiet, do not begin by assuming that the gain is too low. Check the relationship between average loudness and peaks.
Look at LUFS, true peak, crest factor, dynamics, frequency balance, and the way the track behaves when you start limiting it.
Then compare your master against appropriate references at matched playback levels. The goal is not to make the meter display the largest possible number.
The goal is to make the song feel powerful without sacrificing the qualities that made you like it in the first place. A great loud master still needs punch, clarity, depth, and musical movement.
Loudness should support those qualities, not replace them.
Frequently Asked Questions
Your Suno song may have lower integrated loudness, larger transient peaks, greater crest factor, inefficient low-frequency energy, or less compression and limiting than the commercial reference. Compare the tracks at matched playback level before deciding what actually needs to change.
There is no universal LUFS target for every Suno song. The appropriate loudness depends on the genre, arrangement, dynamics, transient structure, distortion tolerance, and intended release context. Spotify currently normalizes its Normal playback setting toward -14 LUFS, but that does not mean every master must be created at exactly -14 LUFS.
Peak level and perceived loudness measure different things. A few short transients can reach close to 0 dBFS while the average energy of the song remains relatively low. Compression, clipping, limiting, and better dynamic control can reduce the gap between peaks and average loudness when the music allows it.
Normalization can raise the overall gain until a selected peak or loudness target is reached, but it does not solve underlying dynamics, tonal balance, or peak-control problems. If the track is already close to the digital ceiling, simple peak normalization may provide little additional loudness.
You can optimize specifically for Spotify’s -14 LUFS Normal playback reference, but -14 LUFS is not a mandatory mastering target. Spotify accepts louder masters and reduces their playback gain when normalization is enabled. I choose the final loudness according to the song rather than one universal number.
First correct tonal or mix problems that consume unnecessary headroom. Then control excessive transient peaks with appropriate compression, clipping, transient processing, or limiting. Raise the final level gradually while monitoring true peak, low-end distortion, transient impact, vocal harshness, and listener fatigue.
dBFS is commonly used to describe digital signal level relative to the maximum possible digital level. LUFS estimates perceived loudness over time using frequency weighting. A track can peak very high in dBFS while remaining comparatively low in integrated LUFS.
Yes. Mastering can control peaks, balance frequencies, manage dynamics, and increase average level with limiting. However, the amount of clean loudness available depends on the quality and balance of the source.
They can when one individual element is preventing the mix from becoming louder cleanly. For example, reducing an overpowering bass stem or controlling an excessively sharp drum transient before mastering can give the final limiter more room to work.
Spotify can apply positive playback gain to quieter tracks when normalization is enabled, but the amount of gain depends on available headroom. Spotify leaves headroom to reduce the risk of distortion, so a quiet track with high peaks may not be raised all the way to the selected normalization level.
Affiliate disclosure: Some links on this page are affiliate links. If you make a purchase through them, we may earn a commission at no extra cost to you. Brand disclaimer: All product names, trademarks, and brands belong to their respective owners. References are for identification and informational purposes only.
Check Out My Custom Mixing Presets!
New Mixing Presets
Waves Vocal Chains
$24.99Original price was: $24.99.$19.99Current price is: $19.99.FabFilter Pro-Q4 Presets
$24.99Original price was: $24.99.$19.99Current price is: $19.99.FL Studio Vocal Mixing Presets
$19.99Original price was: $19.99.$15.99Current price is: $15.99.FL Studio Mastering Presets
$19.99Original price was: $19.99.$15.99Current price is: $15.99.You may also like to read...
Choosing the Right Computer for Your Home Recording Studio
FL Studio Vocal Reverb – Pro Tips for a Clear, Balanced Mix
10 Essential Tips for Mastering with FabFilter Pro-L2
My PSP Datamix A567 Review: Vintage Tone, Digital Precision
A Producer’s Guide: 12 Tips To Creating Hit-Worthy Beats
Vocal Recording Tips: How to Capture a Clean Vocal Take